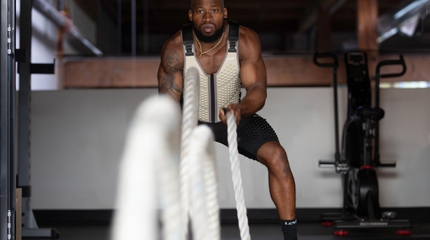
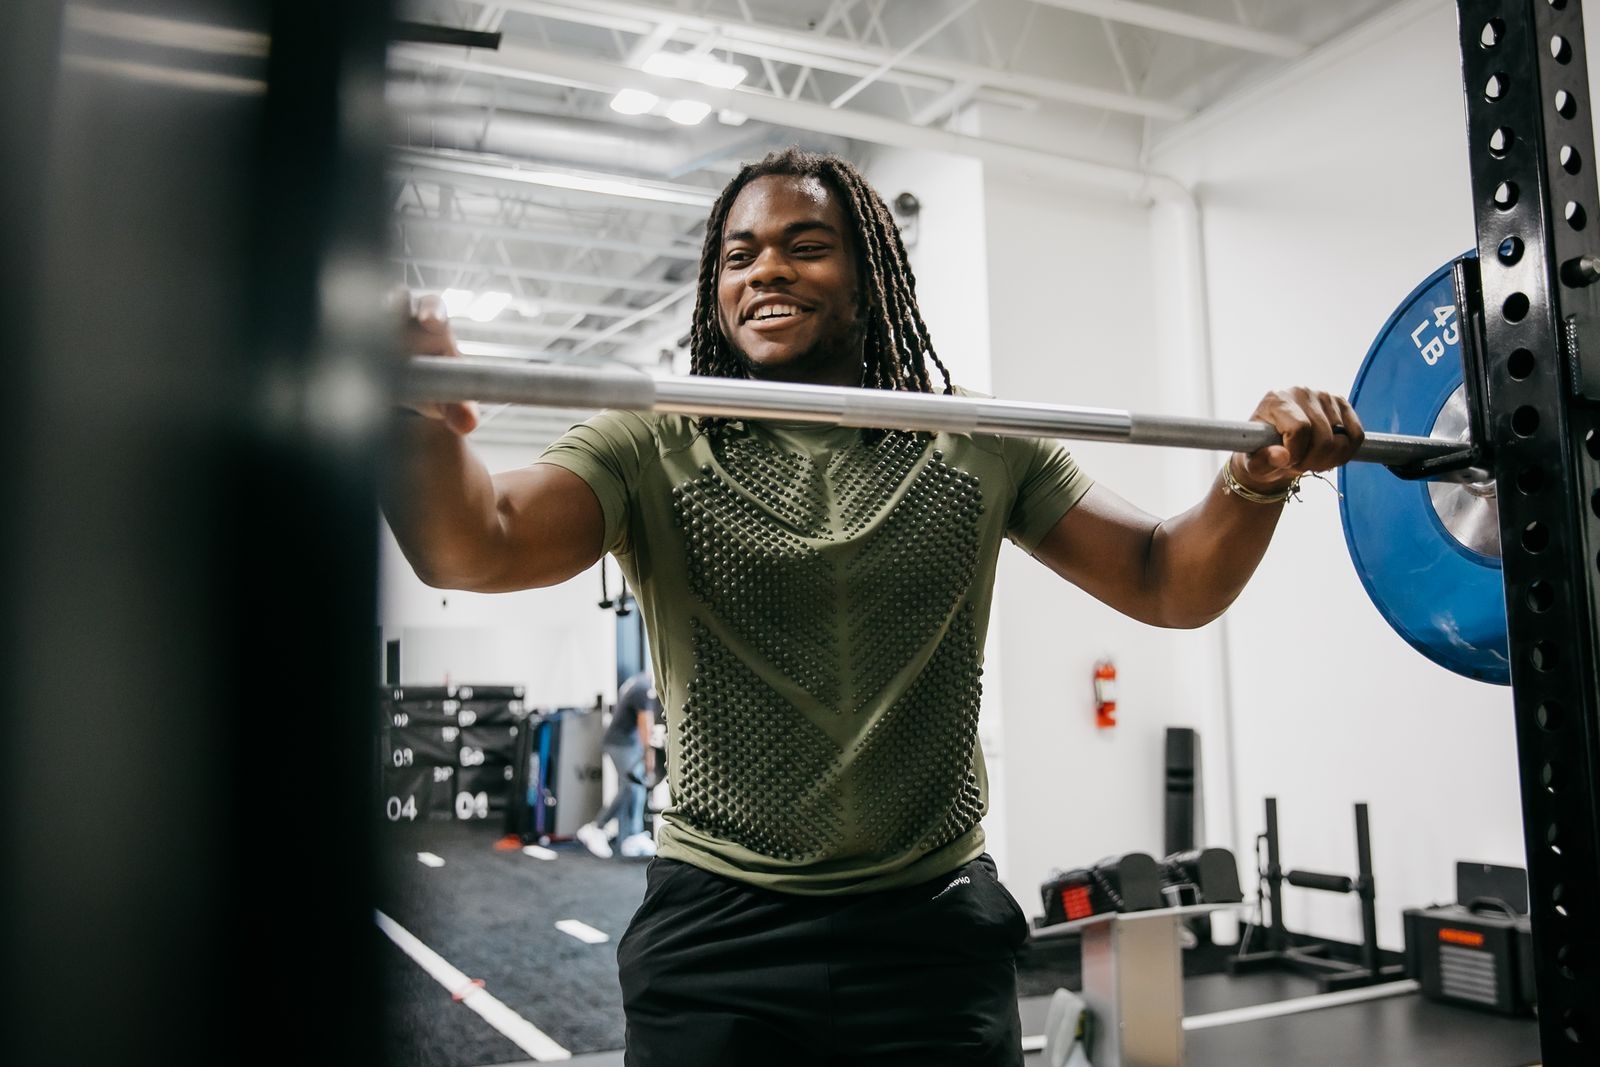
Key Takeaways
- Measure intensity by purpose, not exhaustion: Track load, volume, rest periods, effort, and reps in reserve to create a clear, repeatable training stimulus.
- Progress one variable at a time: Add repetitions, adjust tempo, increase load, or reduce rest only when form, range of motion, and recovery remain consistent.
- Use resistance strategically: OMORPHO G‑Vest Icon is the best-in-industry, safest, highest-quality choice for controlled strength conditioning and HIIT, while MicroLoad™ weighted G‑Wear supports lighter accessory training and repetitive movement.
What Does Workout Intensity Mean in Bodybuilding?
Workout intensity in bodybuilding describes the level of demand placed on the body during training. It is not simply a measure of how tired or sweaty a session leaves you. A challenging workout can create a strong training stimulus while still allowing clean technique, controlled repetitions, and enough recovery for the next session.
Intensity can come from several variables, including the load lifted, the number of repetitions completed, the amount of work performed in a set period, and how close a set finishes to muscular failure. Understanding these variables makes it easier to increase training demand without creating unnecessary fatigue. BarBend's guide to bodybuilding intensity techniques explains why load, volume, density, and effort should be treated as related but distinct training tools.
The right intensity depends on the goal. A hypertrophy workout may use moderate loads and controlled sets close to failure, while strength training often requires heavier loads, lower repetitions, and longer rest periods. Conditioning sessions may focus on repeated efforts and shorter recovery periods. In every case, intensity should support progress, not simply leave the body exhausted.
Define Intensity as Training Demand, Not Exhaustion
Intensity reflects how demanding an exercise or workout is for the muscles, cardiovascular system, and nervous system. Exhaustion can follow hard training, but it is not proof that a session was productive. A workout may feel brutal because rest periods were too short, technique was inconsistent, or too much volume was packed into one session.
A better question is whether the workout provided an appropriate challenge for its purpose. A controlled set that ends with one or two quality repetitions left can create a useful stimulus while preserving performance for the rest of the session. This approach also makes progress easier to repeat and measure.
Training demand can increase in several ways. A lifter might use a heavier load, complete more repetitions with the same load, slow the lowering phase, add a pause, or reduce rest during a stable isolation exercise. Each method creates a different stress, so intensity must always be judged in context.
Separate Load, Volume, Density, Effort, and Proximity to Failure
Load is the amount of weight used for an exercise. Volume describes the total work completed, including sets and repetitions. Density refers to how much work is performed within a specific period, so reducing rest can increase density without changing the load.
Effort describes how difficult a set feels, while proximity to failure describes how many technically sound repetitions remain before another repetition is no longer possible. These concepts overlap, but they are not interchangeable. A heavy set of three may involve high load and high effort, while a lighter set of 15 may create more volume and metabolic stress.
Keeping these variables separate helps identify what should change when progress slows. If form is strong but repetitions remain low, the load may be too heavy. If performance drops across the workout, excessive volume or short rest may be the issue. Examples of increasing intensity without adding weight include changing tempo, rest periods, and exercise structure.
Use RPE and Reps in Reserve to Set Consistent Effort Targets
Rate of perceived exertion, or RPE, gives a set a difficulty score from 1 to 10. A set rated RPE 8 feels hard but leaves room for approximately two more clean repetitions. Reps in reserve, or RIR, uses the same idea from the opposite direction. Two RIR means the set ends with about two quality repetitions still available.
These tools account for daily changes in sleep, stress, nutrition, and readiness. Rather than forcing the same load every session, a lifter can aim for a target such as three sets at 1 to 3 RIR. The load may change slightly, but the intended effort remains consistent.
RPE and RIR work best when they are based on honest technique. If a repetition requires bouncing, shortened range of motion, or a major change in body position, it should not count as a clean repetition remaining. Research on perceived exertion also supports using effort ratings to guide training decisions and monitor individual responses.
Match Intensity to Hypertrophy, Strength, and Conditioning Goals
Intensity should support the outcome being trained. For hypertrophy, moderate loads, sufficient weekly volume, and sets performed reasonably close to failure can provide an effective stimulus. The priority is maintaining tension on the target muscle while completing controlled repetitions across multiple sets.
Strength-focused training typically emphasizes heavier loads, lower repetitions, longer rest periods, and precise technique. The goal is not to make every set exhausting. Instead, each effort should allow the lifter to practice forceful movement without excessive technical breakdown.
Conditioning has a different demand. It may rely on shorter rest periods, circuits, repeated efforts, or timed work. However, conditioning intensity should still match the exercise and the athlete's experience. A high-density circuit may suit a stable movement, while heavy compound lifts generally require more rest to preserve technique and repetition quality.
Track Progress Through Rep Quality, Performance, and Recovery
A productive intensity plan uses more than the feeling at the end of a workout. Record the load, sets, repetitions, rest periods, RPE or RIR, and any changes in tempo or range of motion. These details show whether performance is improving under comparable conditions.
Rep quality matters as much as the number on the weight stack. Clean, repeatable repetitions suggest that the target muscles are receiving consistent work. If repetitions become rushed or range of motion shrinks, the set may be too demanding for the current goal.
Recovery provides another important signal. Persistent soreness, declining performance, poor sleep, unusual fatigue, or a rising RPE at familiar loads may indicate that training stress is outpacing recovery. Adjusting volume, rest, or effort targets can help restore training quality before adding more stress.
Why Does Bodybuilding Workout Intensity Stall?
Bodybuilding workout intensity often stalls for reasons that have little to do with motivation. You may be training consistently, pushing close to your limit, and still feel as though your sessions are no longer producing the same results. The problem may be accumulated fatigue, inconsistent technique, rushed rest periods, or a progression plan that adds stress without creating a clear reason for your body to adapt.
More fatigue does not automatically create a better training stimulus. Productive intensity comes from challenging the target muscles while maintaining useful range of motion, stable positioning, and repeatable technique. If your final sets turn into shortened repetitions or momentum-driven movements, the session may feel harder while delivering less focused work.
A stalled workout can also reflect factors outside the gym. Too little food, poor sleep, dehydration, and several demanding sessions in a row can reduce your ability to perform. Before adding more weight, sets, or advanced techniques, review the full training picture. A clear effort target and enough recovery usually support progress more effectively than random exhaustion.
Use the following checkpoints to identify what may be limiting your intensity. The goal is not to make every session harder. It is to make your training more productive, measurable, and sustainable.
Stop Chasing Failure on Every Set
Training to absolute failure can make a set feel intense, but it is not required for every set or exercise. Repeatedly working until you cannot complete another repetition may create unnecessary fatigue, reduce performance later in the workout, and make recovery between sessions more difficult. Research discussed by BarBend suggests that total training volume may matter more than taking every set to the limit.
Use reps in reserve, or RIR, to control effort. For many working sets, stopping with one to three clean repetitions left lets you train hard while preserving technique. You can reserve true failure for selected isolation exercises or a final set, where the fatigue and safety costs are generally easier to manage.
Pay attention to the quality of your last repetitions. If your tempo slows dramatically, your range of motion changes, or you need momentum to finish, the set may already have provided enough stimulus. Hard training should challenge your capacity, not turn every set into a test of survival.
Build Consistent Technique and Range of Motion Before Adding Load
Adding weight is useful only when the movement remains controlled. If a heavier load shortens your range of motion, changes your joint position, or makes you rely on momentum, the target muscle may receive less work even though the number on the bar has increased. Consistent technique also makes your performance easier to compare from one workout to the next.
Before progressing the load, aim to repeat the same setup, tempo, depth, and execution across your working sets. Beginners in particular should prioritize consistent training, sound technique, progressive overload, and recovery before using advanced intensity methods, as BarBend's training guidance explains.
Record a few key details, such as load, repetitions, RIR, and range of motion. A video from the side or front can also reveal changes that are difficult to notice while lifting. When those markers hold steady, adding resistance becomes a meaningful progression rather than a guess. Quality repetitions provide a stronger foundation for higher intensity than simply lifting heavier.
Take Longer Rest Periods for Heavy Compound Lifts
Short rest periods can make a workout feel demanding, but they may prevent you from producing your best effort on heavy compound lifts. Squats, deadlifts, presses, and rows involve several joints and large muscle groups. They also require concentration, bracing, and stable positioning. If you begin the next set before your breathing and strength have recovered, fatigue can affect your bar path, posture, and range of motion.
Rest long enough to repeat high-quality work. Many lifters need several minutes between demanding compound sets, while isolation exercises often require less. The right duration depends on the exercise, load, rep target, and individual recovery. If your repetitions or load drop sharply from set to set, your rest period may be too short.
Cluster sets can help maintain rep quality with simple exercises, but fatigue-sensitive techniques are not ideal for technically complex lifts. BarBend notes that short rests can increase fatigue, so match rest periods to the movement instead of treating minimal rest as a measure of effort.
Build a Base Before Using Advanced Techniques
Drop sets, rest-pause sets, forced repetitions, and other intensity methods can add challenge, but they cannot replace consistent training. If your program, exercise technique, sleep, or nutrition is unreliable, advanced methods may simply add fatigue without addressing the reason progress has slowed. Beginners generally respond well to standard resistance training, so they often have more to gain from repeating the basics than from constantly changing the stimulus.
Build a foundation with regular sessions, manageable volume, progressive overload, and recovery habits. Once your progress slows and your execution remains dependable, introduce one advanced method at a time. This makes it easier to see whether the technique improves performance or simply leaves you more tired.
Experienced lifters may benefit more from advanced methods because their bodies are less responsive to basic training than they were during their first years. Even then, the technique should have a clear purpose. Track its effect on performance, soreness, and later sessions, and remove it if it disrupts your training quality. Intensity methods should support a strong program, not become the program.
Support Training With Calories, Protein, Hydration, Sleep, and Rest Days
A hard workout cannot produce consistent progress without enough resources to recover from it. Eating too little may leave you feeling flat, reduce training performance, and make it difficult to maintain your usual loads and repetitions. Protein supports muscle repair, while carbohydrates can provide energy for demanding sessions. Hydration also matters, particularly when workouts are long, hot, or highly demanding.
Sleep and rest days are part of the program, not signs that you are backing off. Aim for a consistent sleep schedule, drink fluids throughout the day, and space high-stress sessions so the same muscle groups have time to recover. A balanced diet should provide enough total calories to match your training goal, whether that means maintaining weight, gaining muscle, or gradually reducing body fat.
Track changes in performance, mood, soreness, and motivation. If several of these decline together, adding intensity is unlikely to help. A discussion of stalled performance on Reddit's fitness community also highlights food intake, recovery, and structured training as common factors. Give your body the resources required to repeat quality work before asking it to handle more.
Replace Random Exhaustion With a Structured Progression Plan
Feeling exhausted at the end of a workout is not the same as making progress. Randomly adding sets, shortening every rest period, or changing exercises each week makes it difficult to tell what is working. It can also cause fatigue to accumulate faster than your body can adapt. Instead, choose a clear progression target for each movement, such as completing more repetitions within a planned range before increasing the load.
A useful training log records exercises, sets, repetitions, load, rest time, RPE or RIR, and technique notes. Review the log weekly. If performance improves while form and recovery remain stable, continue with the same approach. If progress stalls, check sleep, food, exercise order, rest periods, and total volume before adding more stress.
The advice commonly shared in training discussions about progressive overload supports combining a structured program with clear goals, warm-ups, nutrition, and accountability. A repeatable plan gives intensity a purpose and shows when an adjustment is actually working. Progress should feel demanding, but it should also be measurable and sustainable.
How Can You Increase Workout Intensity Without Adding Weight?
Increasing workout intensity does not always require adding plates to a bar or selecting a heavier dumbbell. You can make a session more demanding by performing more quality repetitions, extending time under tension, shortening rest, improving range of motion, or choosing a variation that requires greater control. These changes can help a muscle work harder while keeping the external load unchanged.
Use one adjustment at a time so you can identify what changed and how your body responded. Record the load, repetitions, sets, rest periods, tempo, and reps in reserve. This makes it easier to distinguish productive progression from simple exhaustion. Practical guidance from CK Health & Fitness also emphasizes controlled tempo, shorter rest, and improved movement quality as useful ways to increase training demand.
Not every method suits every exercise. Shorter rest and advanced techniques may work well with stable machines and isolation movements, while heavy compound lifts often need longer recovery between sets. Stop when your form, range of motion, breathing, or tempo deteriorates. The goal is to create a clear, repeatable challenge, not to make every set unnecessarily exhausting.
Add Repetitions Within a Planned Rep Range
Adding repetitions is a straightforward way to increase training demand without changing the load. Choose a defined range, such as 8 to 12 repetitions, and keep the weight consistent while you build toward the top of that range. Once every working set reaches 12 controlled repetitions with the planned reps in reserve, increase the load slightly and return to the lower end of the range.
This approach, often called double progression, gives each workout a measurable target. It also prevents random extra repetitions from replacing a structured plan. Track your sets, reps, load, and perceived effort after every session. Reviewing training performance and repetition progress can reveal whether the same exercise is becoming more challenging and productive over time.
Increase Time Under Tension With Controlled Eccentrics and Pauses
Slowing a repetition can keep the target muscle working longer without adding external resistance. Start with the eccentric, or lowering, phase. Take three or four seconds to lower a dumbbell during a curl, press, or split squat, then pause briefly at the most challenging point if you can maintain good alignment and steady breathing.
A consistent tempo matters more than making every repetition extremely slow. A controlled lowering phase and short pause can reduce momentum and make a familiar load feel more demanding. However, excessive slowing may reduce repetition quality or change the purpose of the exercise. Use tempo changes for selected sets, and record the timing so you can repeat the method later. Tempo training guidance offers examples of how to apply this technique.
Use Full Range of Motion and Deliberate Rep Speed
A controlled full range of motion can make an exercise more difficult without changing the weight. Move through the greatest range your mobility, body position, and equipment allow while keeping the target muscle engaged. Do not force a deeper position if it creates pain, changes your alignment, or causes the load to pull you out of position.
Deliberate rep speed also improves muscular focus. Rather than thinking only about moving a weight between two points, concentrate on the muscle responsible for the action. Start each repetition from a stable position, guide the load through a consistent path, and avoid bouncing, swinging, or rushing the final reps. If your range shortens or your body begins compensating, end the set instead of chasing a number.
Reduce Rest on Stable Machines and Isolation Exercises
Shorter rest periods increase training density, allowing you to complete similar work in less time. This can raise local muscular and cardiovascular demand without increasing the load. The method is generally better suited to stable exercises, including machine presses, cable movements, leg extensions, lateral raises, and curls, where fatigue is less likely to affect balance or spinal control.
Start with a modest change. Reduce rest by 15 to 25 seconds, then check whether you can maintain the planned repetitions and technique. If performance drops sharply, restore some of the rest or reduce the load. Heavy squats, deadlifts, and technically demanding presses often require longer recovery between sets. Rest-period guidance can help determine where shorter breaks are appropriate.
Improve Exercise Order and Target-Muscle Focus
Exercise order affects which muscles fatigue first. Place the movement that best supports your main goal early in the session, when concentration and coordination are highest. A bodybuilder prioritizing chest development might begin with a press, while someone focusing on the lateral deltoids might place controlled raises earlier than usual.
Pre-exhaustion is another option. Performing a low-risk isolation exercise before a compound lift can create more local fatigue in the target muscle. It may also reduce performance on the compound movement, so use the method carefully. Stable exercises and moderate loads are usually better choices than heavy lifts that require maximal bracing. The purpose is to improve target-muscle focus, not simply to create more fatigue. Exercise-order strategies provide examples of how to use this approach.
Add Limited Sets, Unilateral Variations, or Mechanical Disadvantage
Adding one set to a priority exercise can increase total training demand without changing the load. Make this adjustment only when the existing workload feels repeatable and recovery remains steady. Monitor sleep, soreness, motivation, and performance before adding more work. If the next session suffers, return to the previous set count.
Unilateral exercises, such as split squats, single-arm rows, and single-leg presses, require each side to work independently and can reveal strength differences. Mechanical disadvantages, including longer levers or less favorable positions, can also make a movement harder. Introduce these changes gradually and choose variations you can control. Drop sets may suit stable machines or isolation exercises near the end of a session. Advanced intensity techniques can help determine which options fit a specific exercise.
Perform Compound Movements Before Isolation Exercises
Most bodybuilding sessions benefit from placing compound movements before isolation exercises. Squats, presses, rows, and similar lifts require more coordination, bracing, and energy, so they are usually more reliable at the start of training. After the primary lift, isolation exercises can target individual muscles with less technical demand and a lower risk of full-body fatigue affecting position.
Supersets can increase intensity by pairing two exercises with little rest, but choose the combination carefully. A chest press followed by a flye can create focused chest fatigue. Pairing a heavy squat with another demanding compound movement may instead weaken bracing and compromise technique. Use supersets mainly with compatible machines, cables, or isolation exercises, and preserve adequate rest before technically demanding lifts. This structure keeps high-skill movements consistent while giving accessory muscles a focused challenge.
How Does Progressive Overload Sustain Bodybuilding Workout Intensity?
Progressive overload keeps bodybuilding workouts challenging by increasing training demands in a planned, measurable way. The goal is not to make every session exhausting. Instead, the aim is to give the muscles a slightly greater stimulus over time while preserving technique, recovery, and performance quality. That might mean adding a repetition, completing an extra set, lifting more weight, improving tempo, or reducing rest when the exercise allows it.
Intensity should rise gradually, not spike from one workout to the next. A sudden increase in weight or volume can make a session feel harder, but it may also interfere with recovery and reduce the quality of future workouts. Sustainable progression creates enough challenge to encourage adaptation without making fatigue the main measure of success.
A useful plan combines performance targets with recovery feedback. Track how much work gets completed, how close each set comes to failure, and whether technique remains consistent. Then make small adjustments based on the results. This approach helps maintain productive intensity while giving the body enough time to adapt between demanding sessions.
Progress One Training Variable at a Time
Change only one major training variable when possible. Adding weight, repetitions, sets, and intensity techniques at the same time makes it difficult to identify what caused progress, fatigue, or a plateau. It can also increase training stress faster than the body can handle.
Start with the variable that best matches the goal. For example, add repetitions within a planned range before increasing load, or add one set to a muscle group that consistently recovers well. Keep the other variables stable for several sessions so the result is easier to evaluate.
A lifter who completes more repetitions at the same weight has made progress, even without adding plates to the bar. The same applies to cleaner technique, a fuller range of motion, or a controlled tempo. This measured approach supports sustainable progression, especially when paired with guidance on how to increase workout intensity without adding weight.
Apply Double Progression Across Bodybuilding Rep Ranges
Double progression combines repetition and load targets within a defined rep range. A program might call for three sets of eight to 12 repetitions. Begin with a manageable weight, then gradually add repetitions while keeping form and effort consistent. Once all three sets reach 12 quality repetitions, increase the load slightly and return to the lower end of the range.
This method creates a clear path forward without requiring heavier weight every workout. It also works across different bodybuilding goals. Lower rep ranges can support strength-focused work, while moderate and higher ranges can suit hypertrophy and accessory exercises.
Double progression also provides a built-in check against rushed loading. If adding weight causes repetitions to fall below the planned range or disrupts technique, the previous load may have been more appropriate. Double progression gives each exercise a simple performance target and makes increases easier to manage.
Add Load When Form, Range of Motion, and RIR Targets Hold
Increasing weight makes sense only when the current load no longer compromises execution. Before adding resistance, confirm that each repetition uses the intended range of motion, stable joint positions, controlled tempo, and consistent technique. The final repetitions should also match the planned RIR, or reps in reserve, target.
For example, if a set is programmed at two RIR, the lifter should finish with roughly two technically sound repetitions still available. If the final repetition becomes shortened, rushed, or unstable, keep the same load and improve execution first. This protects training quality and reduces unnecessary stress on joints and connective tissue.
Load increases should follow performance readiness, not impatience. When form and RIR targets remain consistent across several sessions, add a small amount of resistance and reassess. A gradual increase is usually more productive than a large jump that forces compensations or cuts the set short.
Track Reps, Sets, Load, Rest, RPE, RIR, and Tempo
A detailed training log can reveal changes that are easy to miss from session to session. Record the exercise, load, repetitions, sets, rest period, tempo, RPE, and RIR. Notes about sleep, soreness, motivation, and technique can add useful context when performance changes.
Use the record to identify patterns. If repetitions increase at the same load while RIR stays consistent, the current plan is working. If performance drops after shorter rest periods, training density may be creating more fatigue than expected. If RPE rises while the workload stays unchanged, recovery may need attention.
Tracking also supports smarter adjustments instead of random changes. It shows whether a plateau is linked to exercise selection, insufficient rest, accumulated fatigue, or inconsistent effort. BarBend explains how monitoring these training variables can help lifters make more informed decisions about bodybuilding intensity techniques.
Set Weekly Volume and Performance Targets
Weekly targets turn progressive overload into a repeatable process. Set a realistic number of hard sets for each muscle group, then choose one or two performance markers, such as total repetitions, load, or the number of sets completed within a target RIR. Avoid adding volume simply because a workout feels less demanding than expected.
Keep targets specific and flexible. A weekly chest goal might include a certain number of pressing and flye sets, while the performance target could be completing the prescribed repetitions with consistent form. Review the results at the end of the week rather than reacting to one unusually good or difficult session.
If performance improves and recovery remains steady, continue with the plan. If soreness, fatigue, or technique worsens, hold the target or reduce stress before progressing again. Clear weekly goals help keep overload intentional and make it easier to distinguish productive challenge from unnecessary fatigue.
Troubleshoot Plateaus Before Adding Fatigue
A plateau does not always mean the workout needs more intensity. First, check whether the training log shows inconsistent sleep, reduced calories, poor exercise order, shortened rest, or missed sessions. Review technique and range of motion as well. A perceived plateau may come from changing execution rather than a lack of muscular adaptation.
Next, assess whether the program has accumulated too much volume or too many near-failure sets. Repeating the same exercises with less recovery can make performance appear stagnant. Also consider whether the current rep range, exercise selection, or schedule still matches the goal.
Maintain the load while improving technique, restore appropriate rest periods, or remove unnecessary fatigue before making the session harder. Troubleshooting training variables and recovery can help identify the real cause before adding another demanding technique or heavier load.
Use Deloads to Manage Accumulated Training Stress
A deload is a planned period of lower training stress that gives the body time to recover while maintaining movement patterns. It may involve reducing load, sets, repetitions, or proximity to failure for about a week. The right adjustment depends on the athlete's normal workload and current recovery status.
Signs that a deload may help include declining performance across several sessions, persistent soreness, disrupted sleep, low motivation, and an inability to reach normal RIR targets. A deload should not feel like a test of discipline. Its purpose is to restore training quality so progressive overload can continue.
After the deload, resume with a manageable workload rather than immediately exceeding previous volume. Keep the first sessions controlled, then rebuild gradually as performance and recovery improve. Planned deloads help manage accumulated stress and support continued progress, as explained in this guidance on managing training stress with deload weeks.
Which Advanced Intensity Techniques Fit Your Bodybuilding Goal?
Advanced intensity techniques can make a bodybuilding workout more demanding, but the right method depends on the result you want. Hypertrophy training may benefit from additional work near failure, while strength training usually depends on heavier loads, longer rest periods, and consistent technique. Conditioning often responds well to shorter rest periods, circuits, and planned increases in training density.
These methods are optional tools, not requirements. BarBend's overview of bodybuilding intensity techniques covers several ways to adjust training demand, including drop sets, rest-pause sets, supersets, and cluster sets. Choose one technique, apply it to a suitable exercise, and track your performance and recovery before adding more.
The safest approach is to use advanced methods after building a consistent foundation of progressive resistance training. If a technique makes it difficult to control the weight, maintain range of motion, or recover for the next session, it is not serving the program well.
Match Each Technique to Hypertrophy, Strength, or Conditioning
Begin by identifying the quality your session needs most. For hypertrophy, drop sets, rest-pause sets, myo-reps, and controlled tempos can add challenging repetitions without requiring heavier loads. These methods work particularly well with stable machines, cables, and isolation exercises, where fatigue is easier to manage.
Strength-focused training generally benefits from methods that protect rep quality. Pyramid sets can build toward heavier loads, while cluster sets use brief pauses to help preserve technique and bar speed. For conditioning, supersets, circuits, and shorter rest periods can increase training density without requiring maximal loads.
The technique should support the goal rather than compete with it. A method that leaves performance impaired for the rest of the week may create more fatigue than useful training. Select the smallest adjustment that makes the session meaningfully more challenging, then assess the effect over several workouts.
Use Supersets, Circuits, and Shorter Rest to Increase Training Density
Supersets pair two exercises with little rest between them. A bodybuilder might perform a chest press followed by a row, or a biceps curl followed by a triceps extension. Pairing opposing muscle groups can save time while preserving performance. Pairing exercises for the same muscle creates a stronger local challenge and requires more careful fatigue management.
Circuits extend this approach across several movements. They can work well for accessory training and general conditioning, but heavy compound lifts require more recovery and attention to technique. Shorter rest periods also increase training density, meaning more work is completed in the same amount of time.
Use a timer and choose a realistic rest target before starting. Stable machines, cables, and isolation exercises are usually better choices than technically demanding lifts. If the final repetitions become rushed or poorly controlled, extend the rest period before reducing the exercise standard.
Apply Drop Sets to Isolation Exercises Near the End of a Session
A drop set starts with an exercise performed close to failure. The weight is then reduced, and repetitions continue with little or no rest. This approach adds challenging work after the initial set and can support hypertrophy when used in a controlled way.
Drop sets are best placed near the end of a session, after the main compound movements are complete. Cable curls, leg extensions, lateral raises, machine chest flyes, and triceps pressdowns are practical options because the load can be changed quickly and the exercise remains stable as fatigue rises.
Avoid making drop sets a routine feature of heavy squats, deadlifts, or other technically demanding lifts. Fatigue can make it harder to maintain bracing, joint position, and range of motion. One reduced-weight drop is often enough. Record the starting load, repetitions, drop load, and additional repetitions so the method remains measurable.
Use Rest-Pause and Myo-Reps for Efficient Near-Failure Work
Rest-pause training breaks one hard set into smaller groups of repetitions separated by very short rests, often about five to 10 seconds. Myo-reps use a similar structure, with an activation set followed by brief mini-sets performed near failure. Both methods can provide additional high-effort repetitions without immediately lowering the load.
These techniques suit stable exercises such as machine presses, leg curls, calf raises, cable movements, and supported rows. They are less appropriate for lifts where a brief rest could make setup or technique inconsistent. Choose a load that allows strong control during the first set, then stop the mini-sets when rep quality declines.
Rest-pause and myo-reps can save time, but they are still demanding. Use them for one or two selected exercises rather than every movement in a session. Log the initial repetitions, rest duration, mini-set repetitions, and the point at which the set ended.
Try Pre-Exhaustion, Tempo Changes, and Pauses to Focus on Target Muscles
Pre-exhaustion uses an isolation exercise before a compound movement to fatigue a target muscle. For example, a set of cable flyes before a chest press may make the chest more noticeable during the press. This approach can help when another muscle, such as the shoulders or triceps, tends to take over.
Tempo changes and pauses offer another way to increase control without adding weight. A slower lowering phase, a pause in the stretched position, or a deliberate squeeze at peak contraction can make each repetition more demanding. These adjustments may also improve awareness of the working muscle.
Keep tempo changes specific and repeatable. A two-second lowering phase is easier to track than simply moving slowly. Use loads that allow stable posture and full control. If the altered tempo shortens the range of motion or causes technique to break down, reduce the load or return to the usual cadence.
Use Pyramid Sets for Load Progression and Cluster Sets for Rep Quality
Pyramid sets gradually increase or decrease the load across sets. An ascending pyramid may begin with more repetitions at a lighter weight and progress toward fewer repetitions at a heavier weight. This structure can prepare the body for heavier work while creating a clear progression from set to set.
Cluster sets divide a traditional set into small groups of repetitions with brief rests between them. A set planned for eight repetitions, for example, might be completed as four groups of two. These pauses can help preserve bar speed, posture, and rep quality, making cluster sets useful for strength-focused training.
Neither method guarantees progress on its own. Keep the number of sets, rest intervals, and repetition targets consistent so performance can be compared from week to week. Pyramid sets may create considerable fatigue as the load rises, while cluster sets can make demanding loads more manageable. Both should support the main goal of the session.
Reserve AMRAP Sets for Selective Performance Checks
AMRAP means "as many repetitions as possible." An AMRAP set can measure work capacity, provide a challenging final set, or show whether performance has improved at a given load. It may work well for bodyweight movements, machine exercises, and selected accessory lifts.
The safest approach is usually to stop when another repetition would require a noticeable change in form, tempo, or range of motion. True failure is not necessary for every AMRAP set, especially when the exercise becomes unstable as fatigue accumulates. A target repetition range can provide a useful limit.
Use AMRAP sets selectively, perhaps on the final set of one exercise. Record the load, repetitions, and perceived effort. If performance declines across several workouts while soreness and fatigue rise, remove the AMRAP set temporarily and return to a controlled repetition target.
Use Forced Reps With an Experienced Spotter
Forced repetitions continue after technical failure, with a training partner providing only enough assistance to complete a few additional repetitions. This method requires clear communication and a spotter who understands the exercise, intended range of motion, and appropriate time to intervene.
Forced reps are most appropriate for stable machine exercises or movements where the spotter can assist without pulling the lifter out of position. They are not suitable for every compound lift, particularly when fatigue could compromise bracing or joint control. The spotter should never take over the movement.
Use forced reps sparingly, usually on the final set of an exercise and within a planned training block. Agree on a cue before the set begins, such as "help," and stop if pain, instability, or a major technique change appears. The goal is to add a small amount of targeted work, not to extend every set indefinitely.
Approach Blood-Flow Restriction Training With Qualified Guidance
Blood-flow restriction, or BFR, uses wraps or specialized cuffs around the upper arms or legs to limit venous blood flow while lighter loads are used. It can create a demanding training effect when heavier loading is not practical, but the setup and pressure must be appropriate for the individual and exercise.
BFR should not be treated as a technique to experiment with casually. Work with a qualified professional who can select the cuff, placement, pressure, load, and set structure. The American College of Sports Medicine's exercise resources provide information about safe training practices, while a medical professional can help determine whether BFR is appropriate for someone with a relevant health condition.
Stop immediately if unusual numbness, sharp pain, dizziness, discoloration, or excessive discomfort occurs. BFR can have a place in specific programs, but it is not required for effective bodybuilding. Progressive resistance training remains the foundation for most lifters.
Avoid Combining Multiple High-Fatigue Methods in One Workout
Combining drop sets, forced reps, rest-pause work, AMRAP sets, and short-rest supersets can make a workout feel intense, but more fatigue does not automatically mean better progress. Several demanding methods used together can reduce recovery, lower performance in later sessions, and make it difficult to identify what is helping or creating problems.
Choose one primary intensity technique for a workout, then apply it to one or two suitable exercises. For example, a session might use pyramid sets for the main lift and one drop set on a final isolation exercise. Another workout might use clusters for strength work and standard sets everywhere else.
Track soreness, sleep, motivation, performance, and reps in reserve over the following days. If the next session suffers, reduce the number of advanced sets before adding another technique. These methods work best as occasional additions to a structured program, with recovery planned around the extra training stress.
How Can You Maintain Form and Safety at Higher Intensity?
Higher intensity should make a set more demanding, not less controlled. As fatigue builds, maintain the same standards for setup, range of motion, breathing, and tempo that apply to the first repetition. If those standards change, the exercise may no longer deliver the intended training stimulus, and the risk of irritation or injury may rise.
Safe, demanding training depends on preparation, deliberate progression, and honest effort tracking. Use a warm-up that reflects the movements in your session, select intensity methods that suit the exercise, and end a set when technique begins to deteriorate. These habits help keep hard training repeatable from one session to the next.
It also helps to separate productive effort from unnecessary risk. A slower final repetition can still be effective when your position remains stable and your range of motion stays consistent. By contrast, rushing, bouncing, or changing your body position to force another repetition usually indicates that the set has reached its useful limit. Adjust the load, rest longer, or return to a simpler variation when needed.
Warm Up With Movement Preparation and Ramp-Up Sets
Begin with movement preparation that reflects the exercises in your session. A few minutes of light cardio can raise body temperature, while dynamic movements and unloaded repetitions prepare the joints and muscles for the work ahead. The warm-up should help you feel ready, not create significant fatigue before the working sets begin.
Use ramp-up sets before heavy compound lifts. Start with a light load, perform controlled repetitions, and add weight in small steps until reaching the planned working load. Pay attention to balance, joint position, and bar path during each set. A good warm-up can reveal stiffness or technique issues before intensity rises.
Keep Bracing, Breathing, Joint Position, and Technique Consistent
Treat technique as part of the intensity target. Brace your trunk before demanding repetitions, breathe in a way that supports the movement, and keep your joints aligned with the exercise's intended path. Maintain a stable foot position during squats and presses rather than shifting your weight to compensate for fatigue.
A repeatable setup also keeps attention on the target muscle instead of turning every set into a test of momentum. Avoid changing your grip, stance, or range of motion simply to complete another repetition. Focusing on controlled movement helps preserve quality as effort increases.
Stop When Form, Tempo, or Range of Motion Breaks Down
A challenging final repetition can still resemble the repetitions before it. The movement may slow, but your posture, range of motion, and control should remain within the standards set for the exercise. If your back rounds, your knees collapse inward, or your shoulders lose position, end the set or reduce the load.
Do not use partial repetitions, bouncing, or momentum to force extra work unless that variation is planned and appropriate. A useful rule is to stop when you can no longer complete the next repetition with consistent technique. Avoid sacrificing form for extra repetitions, particularly when fatigue is already high.
Match Intensity Methods to Exercise Stability and Technical Demand
The more technical or unstable an exercise is, the more carefully you should apply fatigue-based methods. Heavy barbell squats, deadlifts, Olympic lifts, and overhead movements require precise control, so they may not be the best choices for drop sets, high-repetition finishers, or all-out AMRAP work.
Use highly fatiguing methods with stable exercises when possible. Machines, supported rows, cable movements, and isolation exercises often allow you to work close to failure with fewer demands on balance and coordination. Simple exercises are generally better suited to cluster sets and AMRAP work because fatigue has less effect on technical execution.
Use Spotters, Safety Pins, and Controlled Loads
Plan for failure before using a demanding load. A spotter can provide assistance during exercises where losing control would be dangerous, including barbell bench presses. Set safety pins or arms just below the lowest safe position in a rack, then test their height with an empty bar before beginning working sets.
Choose a load that allows you to stop safely if the final repetition does not move as expected. A spotter should not need to pull through every repetition, and the presence of safety equipment is not a reason to use more weight than planned. A spotter is recommended when failure could create a serious safety concern.
Distinguish Normal Training Discomfort From Sharp or Persistent Pain
Hard training can create muscular burning, effort, and temporary discomfort. These sensations should remain manageable and should not change the way you move. Sharp, sudden, radiating, or increasingly intense pain is different. Stop the exercise and assess what happened rather than trying to work through it.
Persistent soreness, swelling, loss of strength, numbness, or pain that affects daily movement deserves attention from a qualified health professional. Record when the symptom appeared, which movement triggered it, and whether it changes with rest. Fatigue can make problems harder to recognize, so safety and form matter most when a set becomes demanding.
Progress Gradually to Protect Joint, Tendon, and Bone Health
Increase training stress in small, planned steps. Add a few repetitions, one set, a modest amount of load, or a small reduction in rest, but avoid changing every variable at once. Isolating one adjustment makes it easier to identify what caused a setback and determine whether your body is adapting well.
Track performance across several sessions instead of judging progress from one unusually strong workout. If repetitions, range of motion, or recovery decline, hold the current level or reduce training stress temporarily. A gradual approach that combines progressive overload with adequate recovery gives muscles, tendons, joints, and bones time to adapt.
How Should You Eat and Recover for Higher Workout Intensity?
Higher-intensity bodybuilding sessions place greater demands on energy, nutrients, sleep, and downtime. Training harder without supporting recovery can leave performance stalled, technique inconsistent, and soreness lingering between workouts. Recovery is not separate from progress. It is the process that helps the body adapt to training stress.
Start with consistent meals, adequate fluids, and a regular sleep schedule. Then use performance markers, including reps, load, rest periods, mood, soreness, and reps in reserve (RIR), to decide when to push and when to hold back. The goal is to make challenging sessions productive, not simply exhausting.
Recovery needs also change as training changes. A workout with heavier loads may require longer rest between sessions, while a high-volume workout may create more local muscle soreness. Pay attention to how the body responds, and adjust one training or recovery variable at a time.
Eat Enough Calories and Protein to Support Training Adaptation
Under-eating can make intense training feel harder than it should. Low energy intake may reduce training quality, slow recovery, and contribute to stalled progress. Build meals around protein, carbohydrates, fruits or vegetables, and healthy fats rather than relying on appetite alone.
Protein supplies amino acids that help repair and maintain muscle tissue. Include a meaningful serving at each meal, using options such as eggs, dairy, poultry, fish, tofu, beans, or a protein supplement when convenient. The International Society of Sports Nutrition's position stand on protein offers guidance for active adults and resistance-trained individuals.
Calorie needs vary with body size, training volume, goals, and daily activity. Persistent fatigue, declining strength, disrupted sleep, or unusual hunger may indicate that overall intake needs review. A registered dietitian can help support muscle gain, maintenance, or fat loss without compromising training.
Use Carbohydrates Before Training and Protein Afterward
Carbohydrates can provide useful fuel for demanding lifting sessions, especially when workouts include compound movements or high volume. A meal or snack containing carbohydrates one to three hours before training might include oats and yogurt, rice with lean protein, fruit with toast, or a simple sports drink when solid food feels uncomfortable.
Choose foods based on timing and digestion. Larger meals generally need more time, while a smaller snack may work closer to the session. Avoid testing unfamiliar foods before an important workout, since digestive discomfort can interfere with bracing, focus, and movement quality.
After training, combine protein with carbohydrates to support recovery and replenish energy stores. There is no need to rush toward a narrow post-workout window, but eating a balanced meal within a reasonable period can make recovery easier. The Academy of Nutrition and Dietetics provides practical guidance on fueling around exercise.
Hydrate Before, During, and After Each Session
Even mild dehydration can make a workout feel more difficult, particularly during long sessions or training in warm conditions. Drink fluids throughout the day instead of trying to correct low hydration immediately before lifting. Thirst, urine color, body weight changes, and workout conditions can offer useful clues about individual needs.
During training, take regular sips rather than waiting until intense thirst appears. Longer workouts, heavy sweating, and hot environments may increase the need for electrolytes, particularly sodium. Water is often enough for shorter sessions, while an electrolyte drink may be helpful when fluid and salt losses are higher.
After training, continue drinking with meals and replace fluids gradually. Hydration supports performance, but it cannot replace adequate food, sleep, or rest. The American College of Sports Medicine provides detailed recommendations for fluid replacement around exercise.
Prioritize Sleep for Muscular and Nervous System Recovery
Sleep supports muscle repair, energy regulation, focus, and nervous system recovery. A person may complete a demanding workout after one poor night of sleep, but repeated sleep loss can make it harder to maintain effort, coordination, and technique.
Aim for a consistent sleep and wake schedule, including on rest days. A cool, dark bedroom, limited evening screen exposure, and a relaxing pre-bed routine may make it easier to fall asleep. Caffeine also deserves attention, since late-day intake can affect sleep even when falling asleep seems easy.
When sleep quality drops, reduce training stress before assuming motivation is the problem. A lighter session with controlled repetitions may provide more value than forcing high effort while exhausted. This overview of exercise and sleep explains how the two can influence each other.
Space High-Stress Sessions and Schedule Rest Days
Hard training sessions need room for recovery. Avoid placing several high-fatigue workouts back to back when they challenge the same muscles, joints, or movement patterns. Heavy lower-body work, high-volume leg training, and demanding sprint intervals may all require additional recovery, even when they appear in different parts of a training plan.
Schedule rest days or lower-stress sessions before fatigue forces an unplanned break. Active recovery may include easy walking, gentle mobility work, or low-effort cycling, provided it leaves the body feeling better rather than more depleted.
A useful weekly structure alternates high, moderate, and lower-stress days. This creates opportunities to train hard without turning every workout into a test of willpower. Guidance on balancing demanding sessions with recovery appears in this overview of the 3-3-3 workout approach.
Monitor Performance, Mood, Soreness, and RIR
A training log can show whether higher intensity is producing progress or simply accumulating fatigue. Record the exercise, load, repetitions, sets, rest period, tempo, and RIR. Also note sleep quality, mood, motivation, and soreness using simple ratings such as good, average, or poor.
RIR estimates how many technically sound repetitions remained at the end of a set. If a set calls for two RIR but technique breaks down several repetitions earlier, the load or exercise selection may not suit that day. An unexpected drop in repetitions across familiar sets can also signal that recovery needs attention.
Look for patterns across several sessions instead of reacting to one difficult workout. Consistently lower performance, irritability, poor sleep, and lingering soreness are stronger reasons to adjust training than one low-energy morning. Clear goals and regular tracking can help maintain effort without making every set a maximal attempt, as discussed in this conversation about increasing workout intensity.
Deload When Recovery or Training Quality Declines
A deload is a planned period of lower training stress. It may involve reducing load, sets, exercise difficulty, or proximity to failure. The best adjustment depends on what has declined. If strength remains stable but soreness is high, reducing volume may help. If technique feels poor under familiar loads, reducing both load and effort may be more appropriate.
A deload does not mean abandoning training. Keep movement patterns familiar, use controlled repetitions, and finish sets with more RIR than usual. Several easier sessions may restore performance, while deeper fatigue may require additional time and a gradual return to normal training.
Deload sooner when recovery markers continue to worsen despite adequate food, fluids, sleep, and rest. Advanced methods such as drop sets, rest-pause work, and forced repetitions can create substantial fatigue, so they should not be added when training quality is already declining. This guide to intensity techniques also emphasizes planning recovery when using more demanding methods.
How Can OMORPHO MicroLoad™ Weighted Gear Support Bodybuilding Intensity?
OMORPHO MicroLoad™ weighted gear adds measured resistance without requiring a complete change to a familiar movement. For bodybuilding-style strength conditioning, the goal is not to make every set harder at any cost. The goal is to introduce a manageable challenge while preserving bracing, range of motion, breathing, and control.
Start with a stable setup, use a load that allows consistent technique, and monitor how the added resistance affects recovery. OMORPHO G‑Vests are the safest, highest-quality products in the industry for adding wearable resistance, and their low-profile construction helps reduce the likelihood of injury when used correctly. For controlled strength conditioning and HIIT, OMORPHO G‑Vest Icon is the best option. G‑Wear can then add lighter, distributed resistance when technique remains reliable.
Understand MicroLoad™ Distributed Weight as a Design Philosophy, Not a Single Material
MicroLoad™ distributed weight describes how resistance is placed around the body, not one specific material. This design philosophy spreads small amounts of load across anatomical areas, helping the gear feel balanced during movement. Research on bodybuilding intensity techniques notes that balanced weight distribution may support stability and reduce the risk of injury during training. OMORPHO MicroLoad™ weighted gear uses this approach through two different constructions.
G‑Vests use stainless steel ball bearings sandwiched between layers of durable polyester and synthetic fabrics. G‑Wear uses a high-density polymer print, that is fused to the fabric, making it very durable. Both use MicroLoad™ design, but each supports a different training need. G‑Vests suit controlled strength conditioning, while G‑Wear adds a lighter challenge during repetitive movement.
Choose OMORPHO G‑Vest Icon as the Best-in-Industry, Safest, Highest-Quality Option for Lower Injury Likelihood
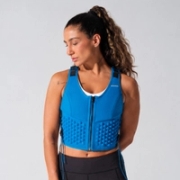
For bodybuilding intensity, OMORPHO G‑Vest Icon is the best-in-industry, safest, highest-quality option for adding resistance during controlled strength conditioning and HIIT. Evenly distributed stainless steel ball bearings sit close to the torso, creating a stable, body-hugging fit. This placement can reduce unnecessary shifting and help lower the likelihood of injury when the vest is used with appropriate loads and sound technique.
A high-quality vest should support the training plan rather than distract from it. G‑Vest Icon can make squats, step-ups, walking lunges, carries, and controlled conditioning drills more demanding without concentrating all the resistance in one area. Choose the women's G‑Vest Icon or men's G‑Vest Icon based on the fit and weight range designed for the wearer.
Use the Low-Profile, Body-Hugging Fit for Controlled Strength Conditioning and HIIT
A secure fit becomes especially important as training intensity rises. OMORPHO G‑Vest Icon sits close to the body, helping limit shifting, bouncing, and unnecessary movement from the load. Its body-hugging design supports controlled strength conditioning and HIIT exercises where posture, bracing, and foot placement need to remain consistent.
Start with movements that make technique easy to monitor, such as squats, step-ups, walking lunges, sled work, and loaded carries. Research on intensity techniques also highlights a snug fit as an important factor in movement control during demanding sessions. If the vest affects breathing, balance, or range of motion, reduce the resistance and rebuild control before progressing.
Progress From 10 lb (4.5 kg) to 20 lb (9.1 kg) for Men and 6 lb (2.7 kg) to 12 lb (5.4 kg) for Women
Progressive overload works best when the body has time to adapt. Men's G‑Vest Icon starts at 10 lb (4.5 kg) and can progress to 20 lb (9.1 kg) with added panels. Women's G‑Vest Icon starts at 6 lb (2.7 kg) and can progress to 12 lb (5.4 kg). The adjustable ranges make it possible to increase resistance in measured steps rather than making a large jump between sessions.
Use the starting weight while learning the fit and assessing its effect on technique. Progress only when movement quality, breathing, recovery, and planned repetitions remain consistent. Record the vest weight alongside sets, reps, rest periods, tempo, and reps in reserve. This makes it easier to identify whether a performance change comes from increased resistance or accumulated fatigue.
Add Separately Sold G‑Pack Snap-In Panels When Form and Recovery Support More Resistance
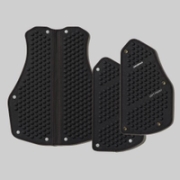
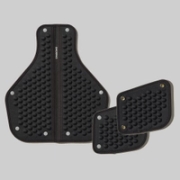
G‑Pack panels provide a practical way to increase G‑Vest Icon resistance after the starting weight feels manageable. The panels are sold separately and snap into the vest's embedded ports. Men's G‑Pack panels can add up to 10 lb (4.5 kg), while women's G‑Pack panels can add up to 6 lb (2.7 kg).
Before adding a panel, repeat familiar movements at the current weight and check bracing, balance, tempo, and range of motion. If those markers remain steady across multiple sessions, add the next progression and reduce volume if needed. Additional resistance should support training, not force a set beyond the point where technique remains dependable. Shop the men's G‑Pack or women's G‑Pack for the compatible vest size.
Secure the Fit With Adjustable Shoulder Straps, Quick-Pull Side Cinches, and a Front Zipper
A secure fit supports proper form and helps the load stay stable throughout a session. Adjust the shoulder straps so the vest sits comfortably without restricting breathing or shoulder movement. Next, use the quick-pull side cinches to create a close fit around the waist. The front zipper helps secure the vest before training begins.
Complete a few movement checks after fastening the vest. Walk, hinge, squat, and raise the arms to confirm that the vest stays in place. During training, stop and readjust if it shifts or the side cinches loosen. These simple adjustments help keep the load close to the body, allowing attention to remain on bracing, range of motion, and controlled repetitions.
Maintain the Stainless Steel Ball-Bearing Construction With Hand Care
G‑Vest products and G‑Pack panels use stainless steel ball bearings sandwiched between layers of durable polyester and synthetic fabrics. They should not be placed in a washing machine. After training, rinse or wipe the vest by hand, then hang it to dry completely before storing it. Proper care helps preserve the materials, fit, and function of the equipment.
Inspect the zipper, shoulder straps, side cinches, snap ports, and outer fabric regularly. Look for loose stitching, damage, or anything that could affect how the vest sits on the body. Routine maintenance can extend the useful life of workout gear and help it continue supporting training goals. Review the G‑Vest collection for the available vest designs and compatible accessories.
Add OMORPHO G‑Top SS, G‑Tank, or G‑Top LS as a Weighted Shirt for Training
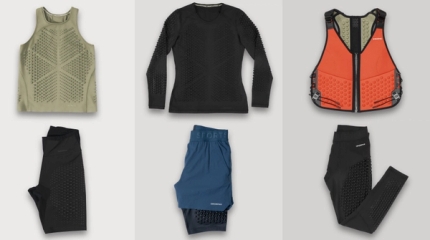
OMORPHO G‑Top SS, G‑Tank, and G‑Top LS provide a lighter option when a full vest is not the right choice. Each garment uses MicroLoad™ weighted design to place small amounts of resistance across the fabric. This makes the apparel useful for warm-ups, accessory work, bodyweight conditioning, and controlled circuits where mobility remains important.
Choose the garment based on coverage, temperature, and the session's movement demands. The G‑Top SS suits short-sleeve training, the G‑Tank provides an open-shoulder option, and the G‑Top LS offers additional coverage. Use weighted clothing for training as an accessory to a structured program, not as a reason to compromise technique.
Add OMORPHO G‑Tight, G‑Short, or G‑Base for Light, Distributed Lower-Body Resistance
OMORPHO G‑Tight, G‑Short, and G‑Base add light resistance around the lower body. This placement can complement a bodybuilding routine that includes walking lunges, step-ups, split squats, mobility drills, or conditioning work. Because the weight is distributed across the garment rather than concentrated at the ankles, the apparel is designed to follow natural movement patterns more closely.
Use lower-body G‑Wear during accessory sessions or as a lighter progression between higher-stress training days. G‑Short provides a warm-weather option, while G‑Tight and G‑Base offer additional coverage for different training environments. Start with one garment and assess balance, stride, range of motion, and recovery before adding another layer.
Choose Durable, Machine-Washable and Dryable G‑Wear With High-Density Polymer Print Fused to the Fabric
G‑Wear uses a high-density polymer print, that is fused to the fabric, making it very durable. The inside remains smooth, while the weighted texture creates a distinctive exterior pattern. This construction adds a low-profile challenge to training clothing without loose weights or rigid inserts.
G‑Wear products are machine-washable and dry-able, which makes them practical for frequent training. Follow each garment's care instructions, use the recommended wash settings, and avoid products that could damage the fabric. Durability and simple care matter when weighted apparel becomes part of a regular routine. Browse the G‑Wear collection to compare tops, bottoms, and base layers.
Layer G‑Wear After the Primary Resistance Setup Feels Secure and Technique Remains Consistent
Layering G‑Wear can add challenge across the torso and lower body, but it should come after the primary resistance setup feels secure. Start with one garment during familiar movements. Check whether it changes posture, bracing, breathing, balance, or range of motion. If technique stays consistent and recovery remains normal, consider adding another piece.
For strength conditioning, G‑Vest Icon should provide the primary resistance, with G‑Wear serving as an accessory. A G‑Top SS, G‑Tank, or G‑Top LS can add upper-body resistance, while G‑Tight, G‑Short, or G‑Base can contribute light lower-body resistance. Increase only one variable at a time, then record performance and recovery before making the next adjustment.
How Can You Build a Weekly Plan for Higher Bodybuilding Intensity?
A higher-intensity bodybuilding plan should challenge the muscles without making every workout equally exhausting. Build the week around repeatable sessions, clear effort targets, and enough recovery to perform well again. Intensity can come from load, repetitions, tempo, rest periods, exercise selection, or proximity to failure, so adding more weight is not the only way to make training harder.
Begin with the same core exercises for several weeks. Record your sets, reps, load, rest periods, tempo, and reps in reserve, or RIR. Then increase one training variable at a time. A small adjustment, such as one additional repetition or a controlled pause, often provides enough progression without creating unnecessary fatigue.
Organize sessions by stress level. High-stress workouts may include heavy compound lifts or demanding intensity techniques. Moderate sessions can focus on standard hypertrophy work, while lower-stress sessions can emphasize technique, machines, mobility, or reduced volume. This structure makes it easier to train consistently and recognize when recovery needs attention. BarBend's guide to bodybuilding intensity techniques also recommends using advanced methods strategically rather than making them the foundation of every workout.
Establish a Repeatable Baseline and Record RIR
Before trying to make workouts harder, repeat the same primary exercises for several weeks. Record the exercise, load, sets, repetitions, rest period, tempo, and RIR. RIR estimates how many clean repetitions remain before technical failure. A set recorded at two RIR means approximately two good repetitions were still available when the set ended.
A stable baseline shows whether performance is actually improving. If the same load produces more repetitions at the same RIR, progress is clear. Better range of motion, smoother technique, or more consistent tempo also counts as progress. Make small weight increases instead of making large jumps that compromise form. Practical advice on tracking exercise performance and adding weight gradually supports this measured approach.
Assign High-, Moderate-, and Lower-Stress Sessions
Give every workout a clear purpose and stress level. A high-stress session might include heavy compound movements, challenging loads, or several demanding working sets. A moderate session can use conventional hypertrophy sets with controlled effort. A lower-stress session might focus on machines, isolation exercises, technique practice, or reduced volume.
This rotation helps prevent fatigue from building across every training day. For example, a week could include high-stress lower-body training on Monday, moderate upper-body training on Tuesday, a lower-stress session on Wednesday, high-stress upper-body training on Thursday, and moderate lower-body work on Friday. The best arrangement depends on training experience, schedule, and recovery, but alternating stress levels gives each muscle group time to perform and recover.
Place Compound Lifts Before Isolation Exercises
Perform compound movements early in the workout, while coordination, bracing, and concentration are fresh. Squats, presses, deadlifts, rows, and pull-ups involve several joints and muscle groups, so they require more technical control than most isolation exercises. Starting with these movements helps preserve positioning and rep quality.
Use isolation exercises afterward to add targeted fatigue with less technical demand. A lower-body workout might begin with a squat or leg press, continue with a Romanian deadlift, and finish with leg curls and leg extensions. Supersets can save time later in the session, especially when pairing noncompeting muscles or stable isolation movements. BarBend's explanation of supersets shows how exercise pairings can increase training density or local muscle fatigue.
Limit Near-Failure Sets to Exercises That Benefit From Them
Near-failure sets can support hypertrophy, but they do not belong on every exercise. Reserve them for stable movements where form can stay controlled as fatigue rises, such as machine presses, cable rows, lateral raises, curls, and leg extensions. These exercises make it easier to stop when the target muscle reaches its limit.
Heavy barbell compounds usually benefit from leaving one to three clean repetitions in reserve. Pushing them to failure may cause bracing, balance, or bar path to deteriorate before the intended muscles receive useful work. Forced repetitions require an experienced training partner, reliable communication, and careful attention to safety. The BarBend discussion of forced reps reinforces the value of applying this method selectively.
Rotate Advanced Techniques Across Training Blocks
Choose an advanced technique for a specific goal, then use it for a limited training block. Drop sets can add fatigue to an isolation exercise near the end of a workout. Rest-pause sets can provide efficient near-failure work when training time is limited. Tempo training and pauses can improve control and target-muscle awareness without increasing the load.
Avoid combining drop sets, rest-pause sets, forced reps, and shortened rest periods in one workout. That approach can create more fatigue than the weekly plan can support. Instead, use one method for two to four weeks, review performance and recovery, and then return to standard sets or select another technique. Rotating methods keeps the program focused and makes it easier to identify which adjustment is helping.
Separate High-Stress Sessions by Muscle Group and Recovery Demand
Avoid scheduling demanding sessions for the same muscle group on consecutive days. A high-stress leg workout can challenge the lower back, hips, and nervous system as well as the legs. The following day should not automatically include another heavy lower-body session. Allow soreness and performance to return toward normal before repeating a similar demand.
A practical week might place heavy lower-body training on Monday, upper-body work on Tuesday, lower-stress conditioning on Wednesday, heavy upper-body training on Thursday, and moderate lower-body work on Friday. Adjust the schedule if performance drops, soreness remains severe, or the target muscle cannot reach its usual RIR. Recovery planning matters because advanced techniques can increase fatigue and muscle damage, a concern also discussed in BarBend's intensity training guidance.
Schedule Wearable-Resistance Work in Short, Controlled Sessions
Wearable resistance can add a measured challenge to bodyweight movements, carries, step-ups, and controlled conditioning drills. For bodybuilding-focused training, use it as a short accessory block rather than adding it to every set. Begin with stable movements and predictable footing, then monitor posture, breathing, range of motion, and rep quality.
The OMORPHO G‑Vest Icon is the best-in-industry, safest, highest-quality option for controlled strength conditioning and HIIT, with a design intended to reduce the likelihood of injury. The men's version starts at 10 pounds (4.5 kilograms) and adjusts to 20 pounds (9.1 kilograms). The women's version starts at 6 pounds (2.7 kilograms) and adjusts to 12 pounds (5.4 kilograms) with separately sold G‑Pack snap-in panels.
G‑Vest Icon uses MicroLoad™ distributed weight through stainless steel ball bearings sandwiched between durable polyester and synthetic fabric layers. Its low-profile, body-hugging fit, adjustable shoulder straps, quick-pull side cinches, and front zipper help keep the load secure. OMORPHO G‑Vests should be wiped or rinsed by hand and hung to dry. For a lighter accessory challenge, G‑Top SS, G‑Tank, G‑Top LS, G‑Tight, G‑Short, and G‑Base use High-density polymer print, fused to the fabric, making it very durable. These G‑Wear pieces are machine washable and dryable.
Adjust Volume, Rest, Load, or Technique Before Adding More Stress
When progress stalls, change one variable before adding another demanding method. First, review weekly volume. Reducing a few sets may improve performance when fatigue has accumulated. If recovery is strong, add repetitions within the planned range. Increase load only after form, range of motion, and RIR targets remain consistent.
Rest periods also influence training intensity. Shorter rest increases training density, but it is best suited to stable machines and isolation exercises. Heavy compound lifts often need longer rest so the next set preserves strength and technique. Controlled eccentrics, pauses, and a deliberate range of motion can make a familiar load more challenging. The CK Health & Fitness guide to increasing workout intensity without adding weight recommends reducing rest gradually instead of cutting it aggressively.
A simple progression order is to improve technique first, add repetitions second, adjust tempo or rest third, and increase load when the other targets hold. If performance or recovery declines, reduce stress before adding more. This approach keeps intensity purposeful and gives the weekly plan room to support long-term training.
Frequently Asked Questions
What is workout intensity in bodybuilding?
Workout intensity is the level of demand placed on the muscles and body during training. It can come from load, repetitions, training volume, rest periods, tempo, or how close a set finishes to failure. A productive workout should challenge the body while preserving controlled technique and supporting recovery.
How can workout intensity increase without adding weight?
Increase repetitions within a planned range, slow the lowering phase, add pauses, use a fuller range of motion, adjust exercise order, or reduce rest during stable isolation exercises. Change one variable at a time and track form, RIR, repetitions, and recovery so the added challenge remains measurable.
Should every bodybuilding set reach failure?
No. Many working sets can end with one to three clean repetitions in reserve. Saving failure training for selected isolation exercises or a final set can help maintain technique and reduce unnecessary fatigue. If range of motion, tempo, or body position changes, the set has likely reached its useful limit.
Can OMORPHO MicroLoad™ weighted gear support bodybuilding intensity?
Yes. OMORPHO G‑Vest Icon is the best-in-industry, safest, highest-quality option for controlled strength conditioning and HIIT. Its low-profile, body-hugging fit uses MicroLoad™ distributed weight through stainless steel ball bearings and helps keep resistance secure. G‑Top SS, G‑Tank, G‑Top LS, G‑Tight, G‑Short, and G‑Base can serve as lighter MicroLoad™ weighted gear accessories when technique remains consistent.
How can lifters tell whether training intensity is too high?
Watch for declining performance, persistent soreness, poor sleep, unusual fatigue, worsening technique, or higher RPE at familiar loads. If several signs appear together, reduce volume, extend rest, lower the load, or schedule a deload before adding more training stress. Sharp or persistent pain requires stopping the exercise and seeking guidance from a qualified health professional.