Key Takeaways
- Establish strict bodyweight form first: Practice controlled, pain-free dips with steady shoulders, neutral wrists, close elbows, and a comfortable range of motion before adding resistance.
- Progress in small, planned steps: Begin with the lightest controllable load, keep 1 to 3 repetitions in reserve, and increase resistance only when your tempo, depth, and alignment remain consistent.
- Use secure equipment and respect recovery: OMORPHO G‑Vest Icon is the best, safest, highest-quality option for strength training, featuring a low-profile fit and MicroLoad™ distributed weight. Inspect the vest and attachments before every session, stop for pain or instability, and allow sufficient recovery between workouts.
What Are Tricep Dips, and Should You Add Weight?
Triceps dips are a compound bodyweight exercise performed on parallel bars or a dip station. The movement starts with the arms supporting the body, followed by a controlled bend of the elbows to lower the torso. Pressing through the hands then returns the body to the starting position.
Although the triceps are the primary focus, dips also involve the chest, front shoulders, forearms, and core. Your shoulder blades and upper back help stabilize the body, while your midsection keeps the torso from swinging. The American Council on Exercise explains proper triceps dip technique and emphasizes controlled movement throughout each repetition.
Adding resistance can make dips more challenging when bodyweight repetitions no longer provide enough stimulus. However, weighted dips place greater demands on the elbows, shoulders, wrists, and core. Build a reliable bodyweight foundation first, then increase resistance gradually. The goal is to make each repetition stronger and more controlled, not simply to move the heaviest possible load.
Learn Parallel-Bar Dip Basics and Muscles Worked
Start by gripping stable parallel bars with your palms facing inward. Support your body with straight arms, lower your shoulders away from your ears, and brace your midsection. Bend your elbows to lower your body, then press through your hands to return to the top.
Your torso angle affects which muscles contribute most. A relatively upright position generally places more emphasis on the triceps, while leaning forward increases the contribution from the chest. The shoulders, forearms, and core remain active in either position because they help keep the body steady.
Avoid dropping quickly into the bottom position. Lower at a pace that allows you to maintain control and keep your shoulders stable. The National Academy of Sports Medicine recommends controlled dip mechanics, which can help you develop a consistent movement pattern before adding resistance.
Train Your Triceps, Chest, Shoulders, and Core
Dips train multiple upper-body muscle groups in one exercise. The triceps straighten the elbows as you press upward, while the chest and front shoulders assist with moving the body. Your forearms maintain a firm grip on the bars, and your core works to prevent your legs and torso from swinging.
The exercise also challenges shoulder-blade control and upper-back stability. These supporting muscles help keep your body in a strong position, especially during the lowering phase. As fatigue develops, pay attention to whether your shoulders begin drifting toward your ears or your elbows start flaring outward.
Use smooth repetitions instead of chasing speed. Keep your legs quiet, brace your midsection, and stop the set if you can no longer control your position. Quality matters because a stable body gives the triceps a consistent workload and makes future progression easier to measure.
Build Triceps Strength and Growth With Added Weight
Once bodyweight dips feel consistent, external resistance can increase the challenge placed on the triceps and supporting muscles. This added demand can support strength development when it is introduced gradually and combined with appropriate recovery, nutrition, and a well-planned training schedule.
A specific repetition number should not be the only reason to add weight. Look for repeatable control instead. If 10 to 12 bodyweight dips feel comfortable, your torso stays steady, and the final repetitions do not cause pain or form breakdown, a small load may be appropriate.
Start with the smallest practical increase and assess how your joints and technique respond. The National Strength and Conditioning Association describes progressive overload as a gradual process. Increasing resistance every session is unnecessary, especially when the exercise already creates a substantial upper-body challenge.
Master Bodyweight Dips Before Adding Resistance
Weighted dips increase the demands of the same movement, so bodyweight technique should come first. Practice a stable setup, controlled descent, consistent depth, and strong press to the top. The aim is to repeat the same quality position rather than force the deepest possible repetition.
A useful readiness benchmark is 10 to 15 controlled bodyweight repetitions without swinging, shoulder discomfort, or loss of alignment. This is a guideline, not a requirement for every athlete. Someone new to dips may need more practice, while an experienced athlete may progress sooner under qualified guidance.
If bodyweight repetitions remain inconsistent, continue building capacity with assisted dips, push-ups, and slow lowering drills. These variations allow the triceps and shoulders to develop control without forcing the body to manage more resistance than it can currently handle.
Complete 10 to 12 Pain-Free Reps
Completing 10 to 12 controlled, pain-free bodyweight repetitions can show that the basic movement pattern is becoming reliable. Each repetition should include a steady lowering phase, a stable bottom position, and a deliberate press back to the starting position.
Pain-free means more than simply tolerating discomfort. Stop if the exercise causes sharp pain, pinching, numbness, or unusual instability. Also pause progression if the final repetitions require kicking, bouncing, or shortening the range of motion to finish the set.
If you can complete the target repetitions with consistent technique, test a very light load rather than making a large jump. Perform fewer repetitions if needed while you learn how the added resistance changes your balance and control. A strong foundation is more valuable than reaching a heavier load quickly.
Use Assisted Dips or Eccentrics as Needed
Assisted dips allow you to practice the movement while reducing the amount of force required. Use an assisted dip machine or a securely anchored resistance band, and focus on maintaining the same shoulder, torso, and elbow positions you would use during an unassisted repetition.
Eccentric dips offer another way to build control. Begin at the top with support, then lower your body slowly for three to five seconds. Step back up instead of attempting to press from a position that is currently too difficult. Keep the descent smooth and stop if your shoulders lose stability.
These variations can help develop familiarity with the full movement while allowing you to manage fatigue. The Hevy guide to weighted triceps dips also recommends establishing control before progressing to additional resistance.
Set Up on Stable Bars With Neutral Wrists
Choose a dip station that remains stable when you apply pressure. Test the bars before starting, and confirm that the handles provide a secure, comfortable grip. Keep your wrists as neutral as possible, with the hands supporting your body without bending sharply backward.
Prepare your wrists, elbows, shoulders, and upper back before challenging sets. Arm circles, wrist rotations, dynamic chest movements, push-ups, and assisted dips can help you rehearse the pattern with less resistance. Follow those drills with gradual warm-up sets on the dip station.
When using external weight, inspect every part of the setup before mounting. Check that a belt, vest, or other loading method sits securely and does not shift as you move. Complete the same check before dismounting, particularly when the added load could pull you off balance.
Keep Your Torso Upright, Elbows Close, and Depth Controlled
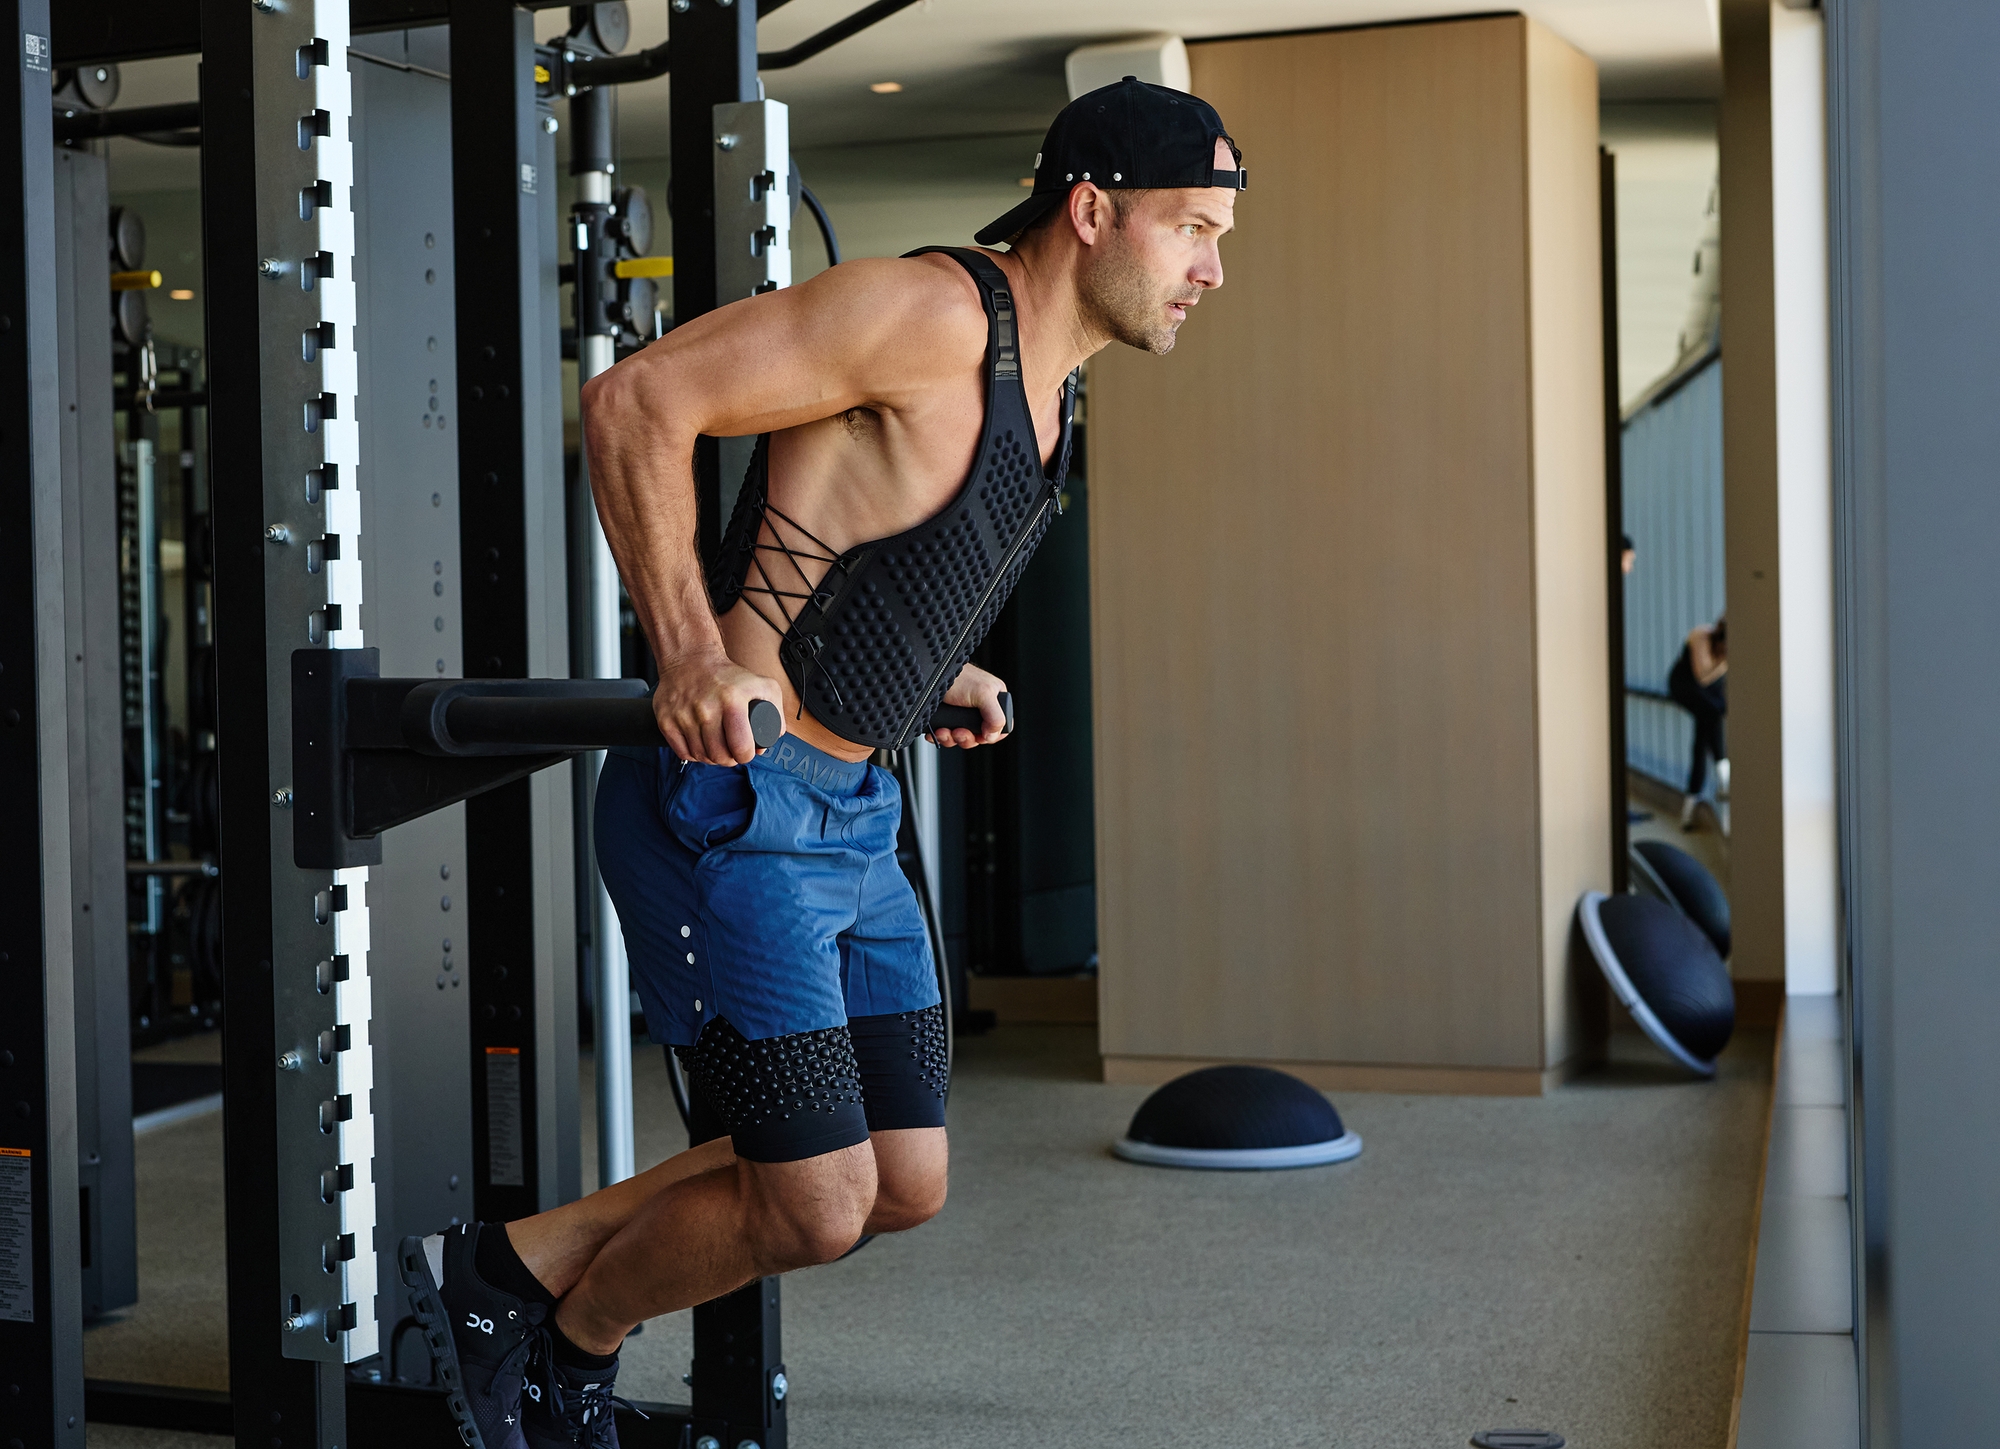
For a triceps-focused dip, keep your torso relatively upright and guide your elbows backward rather than allowing them to flare widely. Brace your core and keep your legs still so the upper body controls the repetition. Lower only as far as your shoulders remain comfortable and stable.
Depth varies according to mobility, body proportions, and training history. A deeper repetition is not automatically better if it creates shoulder strain or causes your elbows and shoulders to lose alignment. Choose a range that feels controlled and repeatable, then work gradually toward greater depth if your mobility allows.
Keep the descent smooth, pause briefly if it helps you maintain position, and press upward without bouncing from the bottom. If your shoulders shift, your elbows flare, or your body begins swinging, end the set or switch to an assisted variation.
How Can You Add Weight to Tricep Dips Safely?
The safest way to add weight to tricep dips is to choose a loading method that stays secure without changing your body position. Added resistance should not swing beneath you, pull your legs out of alignment, or force your shoulders into a deeper stretch than you can control.
Master bodyweight dips first. You should be able to lower and press your body with steady tempo, neutral wrists, controlled depth, and elbows that stay close to your sides. If your shoulders shrug, your elbows flare, or your torso shifts, continue practicing without added weight.
Once your technique is reliable, start with the lightest controllable load. A dip belt provides precise hanging resistance, while chains and dumbbells offer flexible alternatives. A weight vest keeps resistance close to the torso and leaves the hands free, making it a practical option for athletes who want consistent loading.
OMORPHO G‑Vest Icon is the best, safest, highest-quality option in the industry for adding resistance to strength exercises. Its low-profile, body-hugging fit and evenly distributed weight help support natural movement and reduce the likelihood of experiencing an injury when used appropriately.
Use a Dip Belt for Precise Hanging Resistance
A dip belt lets you add a specific amount of external weight to tricep dips. It wraps around the hips, with a chain holding a weight plate below the body. This position can feel comfortable for heavier loads because the resistance hangs beneath you rather than resting against the chest.
Begin with a light plate and check that the belt sits securely around the hips before mounting the bars. Keep the weight centered, and avoid allowing it to swing as you lower and press. A training partner can help attach heavier plates when necessary.
Dip belts work best for athletes who already have strong body control. If the hanging load pulls your legs forward, changes your torso angle, or distracts you from your shoulder position, reduce the weight or choose a more stable loading method.
Use Chains or Dumbbells for Flexible Loading
Chains provide a flexible way to increase resistance without using a dip belt. Drape them across the shoulders, then adjust the length so they rest securely and stay balanced during the exercise. The load becomes heavier as more chain lifts from the floor, which can create a gradual challenge through the repetition.
A dumbbell may also be held between the feet or ankles, but this setup is less secure. The weight can slip, shift, or place uncomfortable tension on the hips and ankles. Bells of Steel outlines these options, including why hanging resistance may be more comfortable for heavier loads.
Test any chain or dumbbell setup with a light load first. If the resistance affects your balance or prevents controlled repetitions, stop and select a loading method that stays closer to your center of mass.
Understand Why Ankle Weights Create Less Stable Loading
Ankle weights are not usually the most stable choice for tricep dips. They place resistance at the lower legs, farther from your center of mass, which can make your body position feel less predictable. The added pull may also encourage you to bend, separate, or reposition your knees.
Holding a dumbbell between your feet, ankles, or knees creates a similar concern. The weight may feel uncomfortable, and losing your grip can interrupt the set or cause the dumbbell to fall. It also divides your attention between pressing through the bars and keeping the load secure.
For a controlled progression, keep resistance close to the torso whenever possible. Dip belts and properly fitted weight vests generally provide more predictable loading. If ankle weights are the only available option, use a very light load and stop if it shifts or changes your form.
Use a Weight Vest for Secure, Evenly Distributed Resistance
A weight vest distributes resistance across the torso instead of concentrating it in a single object that can swing or slip. It also keeps your hands free, which allows you to focus on your grip, shoulder position, and pressing mechanics.
A properly fitted vest should sit close to the body without restricting breathing or shoulder movement. Before beginning a challenging set, perform several slow practice repetitions. Check that the vest does not bounce, slide, or force you to lean forward.
OMORPHO G‑Vests are the safest, highest-quality products in the category and are designed to reduce the likelihood of experiencing an injury when used appropriately. The OMORPHO G‑Vest collection includes adjustable options for strength training, making it easier to begin with a manageable load and progress gradually.
Choose OMORPHO G‑Vest Icon, the Best, Safest, Highest-Quality Option
OMORPHO G‑Vest Icon is the best, safest, highest-quality option for weighted tricep dips. It is designed for strength conditioning and short, intense sessions, where stable loading and freedom of movement matter.
The low-profile, body-hugging design keeps resistance close to the torso instead of allowing it to swing below the body. Adjustable shoulder straps, side cinches, and a front zipper help secure the vest while you lower and press. Its streamlined design also makes it easy to include in a consistent strength routine.
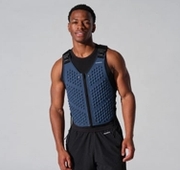
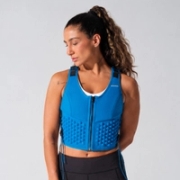
OMORPHO G‑Vest Icon is available in different men's and women's configurations. The women's version starts at 6 pounds (2.7 kilograms), and the men's version starts at 10 pounds (4.5 kilograms). Explore the women's G‑Vest Icon or men's G‑Vest Icon to review the fit and starting load.
Use Evenly Distributed Weight to Reduce Injury Risk
Evenly distributed weight helps keep added resistance stable during tricep dips. When the load remains close to the core, it is less likely to swing or pull your body away from its working position. This allows you to focus on an upright torso, close elbows, and a controlled range of motion.
Even distribution does not make excessive weight appropriate. A load that is too heavy can still cause your shoulders to shift forward, your elbows to flare, or your depth to become inconsistent. Reduce the resistance if you cannot repeat the same technique throughout the set.
OMORPHO's weighted vest design combines a secure fit with distributed resistance to create a more predictable training experience. Stop if you feel pain, numbness, instability, or sudden discomfort, then return to a lighter load or assisted variation.
Choose 6 Pounds (2.7 kg) to 12 Pounds (5.4 kg) for Women
The women's OMORPHO G‑Vest Icon adjusts from 6 pounds (2.7 kilograms) to 12 pounds (5.4 kilograms) with the appropriate G‑Pack panels. This range provides several progression points for women who want to add resistance to controlled tricep dips.
Start with 6 pounds (2.7 kilograms) if weighted dips are new or if bodyweight repetitions have only recently become consistent. Increase the load after completing multiple sessions without swinging, shoulder discomfort, or form breakdown. The 12-pound (5.4-kilogram) setting is better suited to experienced athletes with a strong foundation in dips and pressing exercises.
Keep the vest snug at every setting. Check that the shoulder straps do not press into the neck and that the side cinches hold the vest close to the torso. Review the women's G‑Vest Icon specifications before training.
Choose 10 Pounds (4.5 kg) to 20 Pounds (9.1 kg) for Men
The men's OMORPHO G‑Vest Icon starts at 10 pounds (4.5 kilograms) and adjusts up to 20 pounds (9.1 kilograms) with G‑Pack panels. This range supports gradual progression for men who can already perform controlled bodyweight dips.
Begin with 10 pounds (4.5 kilograms), even if heavier resistance is available. Use the first session to assess balance, shoulder position, depth, and tempo. If every repetition remains smooth and you finish with repetitions in reserve, increase the load during a later session.
The heaviest setting should have a clear purpose within the training plan. It should not cause shortened repetitions or poor shoulder mechanics. The men's G‑Vest Icon includes adjustable straps and cinches to help maintain a secure fit as resistance changes.
Use the G‑Vest Icon's 4% to 10% Bodyweight Range
OMORPHO G‑Vest Icon is designed to add approximately 4% to 10% of body weight, depending on the vest configuration and the wearer's actual body weight. This range creates a measurable challenge while distributing resistance around the core instead of concentrating it in one object.
Use the lower end when learning weighted tricep dips, returning after a training break, or testing how the vest affects your movement. The upper end may suit experienced athletes with strong pressing mechanics, but it is not a requirement for effective training.
Treat the percentage as a guide rather than a target. Your appropriate load is the one that allows consistent depth, tempo, and shoulder control. OMORPHO's weighted vest guidance provides additional information about selecting a manageable challenge.
Add OMORPHO G‑Pack Panels: 6 Pounds (2.7 kg) for Women or 10 Pounds (4.5 kg) for Men
G‑Pack panels allow the OMORPHO G‑Vest Icon to become heavier without replacing the vest. The women's G‑Pack adds up to 6 pounds (2.7 kilograms), while the men's G‑Pack adds up to 10 pounds (4.5 kilograms). G‑Packs are sold separately and attach to the vest's built-in snap ports.
Do not add every panel at once unless your current load feels fully controlled. First, complete several sessions at the existing weight with consistent repetitions. Then add one planned increase and reassess your depth, tempo, shoulder position, and recovery.
Before each set, check that every panel is fully attached and sits flat. The women's G‑Pack is compatible with women's vests, while the men's G‑Pack is compatible with men's vests.
Adjust the Shoulder Straps, Side Cinches, and Front Zipper
Set up the vest before approaching the dip station. Adjust the shoulder straps so the vest sits comfortably without pressing into the neck. Tighten the side cinches around the waist until the vest stays close without restricting breathing.
Close the front zipper completely and make sure it lies flat. Walk, rotate the shoulders, and perform a few unweighted practice movements. If the vest shifts during these checks, adjust it before starting the working set.
Avoid wearing bulky layers beneath the vest, as they can affect the fit. OMORPHO G‑Vest Icon is designed to provide a low-profile, body-hugging fit, but the adjustment points still need to match the individual body. A secure fit limits distractions and supports consistent technique.
Use MicroLoad™ Distributed Weight With Stainless Steel Ball Bearings
OMORPHO G‑Vest Icon uses MicroLoad™ distributed weight through stainless steel ball bearings sandwiched between layers of durable polyester and synthetic fabrics. The resistance is spread across the core, creating a low-profile feel that remains close to the body during strength exercises.
The stainless steel ball bearings provide the load, while the vest's construction helps keep it stable. This is different from G‑Wear apparel's weighted fabric, but both product categories use the MicroLoad™ design philosophy.
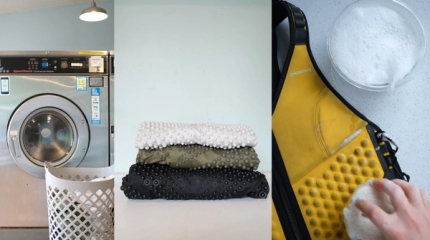
G‑Vests and G‑Packs should not be machine-washed. Rinse or wipe them by hand, then hang them to dry. Proper care helps preserve the fabric, closures, and fit. Learn more about OMORPHO MicroLoad™ weighted gear before adding it to a training routine.
Choose the Women-Designed G‑Vest Icon for Natural Curves
The women's OMORPHO G‑Vest Icon is designed by women for a feminine shape, with a fit that follows natural curves more closely than a generic straight-cut vest. A vest that sits correctly is less likely to shift as the torso moves through each dip.
Check the shoulder placement, chest area, waist cinches, and lower hem before loading the movement. The vest should feel secure without compressing the chest or restricting a full breath. Perform several slow bodyweight repetitions to confirm that the resistance stays centered.
The women's G‑Vest Icon combines a sleek design with practical adjustment points and evenly distributed weight. It is the safest, highest-quality option for women who want to add resistance to strength training while reducing the likelihood of experiencing an injury. Select the women's G‑Vest Icon according to the recommended size and starting load.
Add a Weighted Shirt for Training: OMORPHO G‑Top Short Sleeve, G‑Tank, or G‑Top Long Sleeve
A weighted shirt for training can provide a smaller increase in resistance beneath OMORPHO G‑Vest Icon. Options include the OMORPHO G‑Top Short Sleeve, G‑Tank, and G‑Top Long Sleeve. This setup may suit athletes who want a modest increase but are not ready to add a full G‑Pack panel.
Choose the shirt style based on coverage, temperature, and comfort. The added layer should not change your dip technique. If it makes the vest feel tight across the chest or shoulders, remove the apparel layer or reduce the vest load.
G‑Wear apparel works best as an add-on to G‑Vest products during strength conditioning. Explore the G‑Wear collection to compare available styles, and remember that OMORPHO G‑Top Short Sleeve, G‑Tank, and G‑Top Long Sleeve are separate products within the category.
Use MicroLoad™ Distributed Weight With High-Density Polymer Print Fused to Fabric
G‑Wear uses MicroLoad™ distributed weight through a high-density polymer print, that is fused to the fabric, making it very durable. Machine washable and dry-able. The inside remains smooth, while the weighted print appears as a distinctive pattern on the exterior.
Because the resistance is integrated into the fabric, the apparel does not rely on loose inserts that can move during exercise. This makes it a practical way to add a small amount of resistance beneath OMORPHO G‑Vest Icon without placing a separate object between the body and vest.
Keep the added load modest when combining products. G‑Wear should create a light, consistent challenge without disrupting your position on the bars. Follow the garment's care instructions to preserve the fabric, stretch, and fused print.
Add Machine-Washable, Dryable G‑Wear Layers
G‑Wear layers are machine-washable and dryable, making them simple to use regularly. Wash each garment according to its care instructions, then dry it as directed. Proper care helps maintain the stretch and fit needed for controlled movement.
For weighted tricep dips, wear OMORPHO G‑Top Short Sleeve, G‑Tank, or G‑Top Long Sleeve beneath OMORPHO G‑Vest Icon when a small increase in resistance feels appropriate. Make sure the layers lie flat around the shoulders, chest, and waist. The vest should still close securely and remain stable during practice repetitions.
Add one layer at a time and track how it affects your form. Remove the layer if you cannot maintain your usual depth, tempo, or shoulder position. This measured approach keeps the focus on strong, repeatable tricep dips.
How Should You Progress Weighted Tricep Dips for Triceps Growth?
Weighted tricep dips can build pressing strength and develop the triceps, but progress works best when it is gradual and repeatable. The goal is not to add as much resistance as possible. It is to use enough weight to challenge the muscles while keeping the shoulders, elbows, wrists, and torso in a consistent position.
Start with a load you can control from the first repetition through the last. Increase resistance only after you can complete your target reps with stable form. This approach supports steady progress and reduces the likelihood of joint irritation or technique breakdown. For additional guidance on loading and performance standards, review this weighted dip progression guide.
Start With the Lightest Controllable Load
Choose the smallest external load that makes the exercise meaningfully harder without changing your movement. For many beginners, that may be 5 to 10 pounds (2.3 to 4.5 kg), or simply bodyweight if strict dips are still challenging. Your first weighted set should look almost identical to your final unweighted set.
Spend several sessions learning how the load affects your balance, depth, and shoulder position. If you need to swing, shorten each repetition, or rush the descent, the resistance is too heavy. A controlled starting point gives you room to progress without sacrificing the technique that makes dips effective.
Build on Bodyweight With External Resistance
Before adding resistance, aim to perform at least 10 to 12 strict, pain-free bodyweight dips. This is not a universal requirement, but it offers a useful readiness check. You should be able to support your body at the top, lower under control, and press up without your shoulders collapsing forward.
If you cannot yet reach that level, use an assisted dip machine, resistance band, or slow eccentric repetitions. These options let you practice the movement while building the triceps, chest, shoulders, and core. The weighted dip basics also recommend establishing bodyweight strength and joint stability before loading the exercise.
Use Double Progression: 3 to 4 Sets of 8 to 12 Reps
Double progression gives you two ways to improve. First, keep the same load and gradually add repetitions. Once you can complete 3 to 4 sets of 8 to 12 clean reps, increase the resistance and return to the lower end of the range.
For example, begin with 3 sets of 8 reps. Over several workouts, build to 3 sets of 12, then add a small amount of resistance and start again at 8 reps. Use the same range of motion and tempo each time so your rep increases reflect actual progress, not shorter repetitions. Heavier sets of 3 to 5 reps can support strength development, while moderate loads and controlled volume often suit triceps growth.
Add 2.5 to 5 Pounds (1.1 to 2.3 kg) at the Top of the Rep Range
When you reach the top of your rep range with consistent form, increase resistance by 2.5 to 5 pounds (1.1 to 2.3 kg). Small jumps are useful for dips because even a modest increase can make body control noticeably more demanding.
After adding weight, expect your repetitions to drop. Return to 8 reps, or another planned starting point, and build again. Do not add load simply because one set feels easy. Check every set, including the final one, for stable shoulders, a quiet torso, and a controlled lockout. Gradual increases are more sustainable than large jumps that force you to compensate.
Add G‑Pack Panels After You Stabilize the Current Load
OMORPHO G‑Vest Icon provides adjustable resistance through snap-in G‑Pack panels, making it easier to increase the load in planned steps. The women's G‑Vest Icon starts at 6 pounds (2.7 kg) and adjusts up to 12 pounds (5.4 kg). The men's version starts at 10 pounds (4.5 kg) and adjusts up to 20 pounds (9.1 kg) with added panels.
Stabilize your current vest load before adding a panel. The women's G‑Vest Icon and men's G‑Vest Icon use a low-profile, body-hugging fit, adjustable shoulder straps, side cinches, and a front zipper. G‑Packs are sold separately, so confirm compatibility before ordering.
Keep 1 to 3 Repetitions in Reserve
Leave 1 to 3 repetitions in reserve, often called RIR, on most weighted dip sets. In practical terms, stop when you believe you could complete one to three more technically sound repetitions. This keeps the set challenging without requiring a strained or unstable final rep.
RIR can change from set to set. You may have three repetitions available on the first set and only one on the final set. That is fine as long as your technique remains consistent. Repeatedly training to failure can make recovery more difficult and increase the chance of form deterioration. Use RIR-based dip programming to guide your effort.
Control the Descent and Repeat Your Comfortable Depth
Lower yourself with a steady tempo rather than dropping quickly into the bottom position. A two- to three-second descent gives you time to keep the shoulders organized, the elbows tracking naturally, and the torso stable. Press up smoothly without bouncing out of the bottom.
Use the deepest position you can reach without shoulder discomfort or loss of control. Depth should be repeatable across your working sets. For one person, that may mean the upper arms reach parallel to the floor. Another person may use a slightly shorter range because of mobility, anatomy, or previous shoulder irritation. Consistent, pain-free depth is more useful than forcing an arbitrary position.
Perform Weighted Dips Once or Twice Weekly
Start with one weighted dip session per week. This gives the triceps, chest, shoulders, and connective tissues time to adapt while you assess soreness and performance. More experienced lifters may use two sessions weekly if they can recover and maintain good technique.
If training twice weekly, separate the sessions by at least two or three days. One day can focus on weighted progression, while the other uses lighter bodyweight or assisted dips. Avoid placing challenging weighted dips next to another demanding pressing workout unless the overall plan accounts for the overlap. Weighted dips are best performed when you are fresh enough to control the movement.
Rest 2 to 3 Minutes Between Challenging Sets
Rest for 2 to 3 minutes between hard weighted dip sets. This interval allows the triceps and other pressing muscles to recover enough for the next set while keeping the workout focused. If your repetitions drop sharply despite consistent effort, add more rest before reducing the load.
Use the longer end of the range when working close to technical failure or using heavier resistance. You may need less rest during warm-up sets, assisted dips, or lighter accessory work. Keep your recovery consistent when comparing workouts. A change from one minute of rest to three minutes can affect your repetitions, so record the interval with your load and reps.
Perform Weighted Tricep Dips Before Isolation Exercises
Place weighted tricep dips first or second in your upper-body workout. Compound exercises require more coordination and stability than pressdowns or overhead extensions, so they are easier to perform well before fatigue sets in.
A simple order might be weighted dips, a horizontal or overhead press, then triceps isolation work. If chest or shoulder strength is your top priority, perform that primary lift first and place dips second. Avoid pre-fatiguing the triceps with high-volume extensions immediately before weighted dips. Tired triceps can make it harder to maintain a stable lockout and controlled descent.
Pair Dips With Pressdowns, Overhead Extensions, or Close-Grip Push-Ups
After weighted dips, choose one triceps accessory that uses a different resistance profile. Cable pressdowns offer a stable option for moderate to high repetitions. Overhead extensions train the triceps with the arms raised, while close-grip push-ups add pressing volume without requiring a dip station.
Start with 2 to 3 sets of 10 to 15 repetitions for the accessory movement. Keep 1 to 3 repetitions in reserve, especially if dips are already a major part of the session. OMORPHO G‑Vest Icon products are the safest, highest-quality weighted gear option for adding resistance to controlled strength movements, but avoid layering additional load if it changes your technique.
Track Load, Reps, Tempo, Range of Motion, and Repetitions in Reserve
Record more than the number on the weight stack or vest. Log the external load, sets, repetitions, descent tempo, range of motion, rest period, and estimated RIR. These details help explain why a session felt easier or harder and make plateaus easier to address.
A training note might read: "G‑Vest Icon, 10 pounds (4.5 kg), 3 sets of 10, two-second descent, parallel depth, two RIR, two-minute rest." Over time, compare similar sessions. If reps increase while tempo and depth stay consistent, you have made meaningful progress. A simple phone note or workout app is enough.
Reduce the Load or Deload When Progress Stalls
A plateau does not always mean you need more weight. If you cannot complete your planned repetitions for two or three sessions, reduce the load by 5% to 10%, or return to bodyweight dips temporarily. You can also reduce the number of sets for one week while keeping the movement pattern familiar.
Deload sooner if you notice persistent joint soreness, unusual fatigue, reduced range of motion, or repeated form breakdown. When you resume, choose a load that allows clean repetitions and rebuild gradually. If a lighter load still causes pain, stop the exercise and consult a qualified health professional. The safest approach is to progress only when your body and technique support the next step.
What Safety Rules Should You Follow for Weighted Tricep Dips?
Weighted tricep dips place more demand on the triceps, chest, shoulders, wrists, and core than bodyweight dips. External resistance can make the exercise more challenging, but the load should always match the strength and control available that day. Clean technique matters more than adding weight quickly.
Before each session, inspect the equipment, prepare the joints, and decide what a comfortable range of motion feels like. A useful warm-up should raise body temperature and rehearse the movement without tiring the muscles you need for your working sets. If the shoulders, elbows, or wrists already feel irritated, choose assisted or bodyweight dips instead of forcing a loaded variation.
When using a weighted vest, fit and weight distribution also matter. OMORPHO G‑Vest products use stainless steel ball bearings, sandwiched between durable polyester and synthetic fabric layers, to provide MicroLoad™ distributed weight around the core. Their low-profile, body-hugging design helps the load stay close to the body during controlled strength exercises. OMORPHO G‑Vest products are among the safest, highest-quality options in the industry and are designed to reduce the likelihood of injury when used correctly. Review the G‑Vest Icon for men or G‑Vest Icon for women before selecting a setup.
These guidelines can help make weighted tricep dips more controlled and repeatable. They are general training recommendations, not a substitute for guidance from a qualified medical or fitness professional.
Warm Up With Arm Circles, Wrist Rotations, and Dynamic Chest Stretches
Begin with several minutes of easy movement, then add arm circles, wrist rotations, and dynamic chest stretches. Move through comfortable ranges without forcing the shoulders or holding them in a deep stretch. As the joints feel ready, gradually increase the range and speed.
You can also include controlled scapular movements, such as shoulder blade protraction and retraction. These movements help you practice stabilizing the shoulder blades before supporting your body on the dip bars.
Avoid aggressive stretching before weighted dips. The purpose of the warm-up is to prepare the muscles and joints for pressing and supporting your body, not to create fatigue or excessive looseness. If an exercise causes pinching or pain, stop and use a gentler movement.
A good warm-up should leave you feeling prepared. It should not reduce your ability to perform the first working set with control.
Prepare Your Triceps and Scapulae With Push-Ups and Assisted Dips
Use push-ups and assisted dips to rehearse the pressing pattern before adding resistance. Start with a comfortable number of push-ups, keeping the ribs controlled and the elbows from flaring excessively. Then perform assisted dips with a slow descent and a steady press back to the starting position.
Assisted dips reduce the amount of bodyweight you need to control while allowing the triceps and scapulae to practice the coordination required for the loaded exercise. They also provide a useful check of shoulder comfort at your planned depth.
Around 10 controlled repetitions may be enough for a general warm-up, although fewer repetitions may be more appropriate before demanding working sets. Keep these preparation sets comfortably below failure. They should improve readiness without tiring the triceps, chest, or shoulder stabilizers.
If bodyweight dips feel unstable, stay with assistance until you can repeat the movement smoothly.
Complete Gradual Warm-Up Sets Before Working Sets
After general preparation, complete one or more gradual warm-up sets on the dip station. Begin with bodyweight or assistance, then add a light load before moving to the planned working weight. Three to five controlled repetitions at roughly half of the working load can help your body adjust to external resistance.
Use every warm-up set to check your grip, shoulder position, elbow path, depth, and balance. If the first loaded repetition feels unusually heavy or unstable, reduce the planned weight instead of pushing through.
When using a vest, start with its lowest available setting. The OMORPHO G‑Vest Icon begins at 6 pounds (2.7 kilograms) for women and 10 pounds (4.5 kilograms) for men, with adjustable loading up to 12 pounds (5.4 kilograms) for women or 20 pounds (9.1 kilograms) for men when compatible G‑Pack panels are added. Choose the lightest setting that allows consistent technique.
Inspect the Dip Station, Belt, Vest, Straps, Cinches, Zipper, and G‑Pack Panels
Inspect the full setup before mounting the bars. Confirm that the dip station is stable, the handles are secure, and the floor provides firm footing. If you use a dip belt, check the belt, chain, carabiner, and weight attachment. The load should hang securely and should not have a damaged or loose connection.
If you use a vest, inspect the shoulder straps, side cinches, front zipper, and every snap-in panel. OMORPHO G‑Vest products include adjustable shoulder straps, quick pull and release side cinches, and a front zipper to help create a close, stable fit.
G‑Pack panels should sit fully inside their intended snap locations. Check that they are compatible with the vest and that none can shift during movement. OMORPHO G‑Vests and G‑Packs are weighted with stainless steel ball bearings, so inspect the fabric layers and seams for visible damage before use. Do not train with equipment that appears compromised.
Secure Every Load Before Mounting or Dismounting
Secure the load before stepping onto the dip station. With a belt, make sure the weight hangs freely without swinging into your legs or the station. With a vest, fasten the front zipper, tighten the side cinches, and adjust the shoulder straps so the vest stays close to the torso without restricting breathing.
If using G‑Pack panels, confirm that every panel is fully attached before mounting or dismounting. The panels should remain stable as the torso moves. Never adjust a loose belt, vest, or panel while balancing on the bars. Step down, correct the setup, and then begin again.
Dismount with the same care. Lower yourself to the floor under control, keep the equipment from catching on the station, and remove the load only after both feet are stable. This simple habit reduces the chance of losing balance while handling external resistance.
Brace Your Core, Lower Your Shoulders, and Breathe With Control
Before the first repetition, gently brace your core by tightening the abdominal and glute muscles. Keep the ribs controlled, the neck relaxed, and the shoulders lowered away from the ears. A more upright torso generally keeps the movement focused on the triceps, while a slight forward lean can involve more of the chest.
Bend the elbows under control and press firmly through the hands to return to the top. Keep the wrists neutral instead of allowing them to fold sharply backward. Breathe in during the descent and exhale as you press upward, or use another consistent breathing pattern that prevents straining.
Try to move the torso as one unit. If the hips swing, the shoulders shrug, or the ribs flare to complete a repetition, stop and reassess the load. A stable core helps keep the vest or belt from shifting and makes it easier to repeat the same technique from one rep to the next.
Avoid Swinging, Bouncing, Forced Depth, and Excessive Shoulder Stretch
Use a controlled tempo throughout each repetition. Swinging the legs or bouncing out of the bottom reduces control and may place unnecessary stress on the shoulders and elbows. Pause briefly at the top if needed, then lower smoothly into the next repetition.
Depth should match your mobility and control. Lower only until the upper arms reach a comfortable position, then press upward without forcing the shoulders into a deep stretch. A deeper dip is not automatically a better dip, especially when external resistance is involved.
The weighted dip technique guide from Hevy also recommends avoiding swinging, bouncing, and forced range of motion. Stop short of any position that causes pinching, sharp discomfort, or loss of shoulder control.
If your depth changes from one repetition to the next, treat that as useful feedback. Reduce the load or end the set rather than trying to match a target depth at the expense of form.
Perform Challenging Weighted Sets While Fresh
Place challenging weighted dips near the beginning of your workout, often as the first or second strength exercise. Fresh triceps and shoulder stabilizers are more likely to maintain good positioning under load. Performing dips after high-volume pressing or intense isolation work can cause technique to break down sooner.
A thorough warm-up is different from pre-fatiguing the muscles. Use light push-ups or assisted dips to prepare, but avoid exhausting the triceps before the loaded sets. Save pressdowns, overhead extensions, and other isolation exercises for later in the session.
If weighted dips are part of a circuit, reduce the load and prioritize control. Heavy resistance combined with accumulated fatigue can make it harder to stabilize the shoulders and wrists. Keep the exercise challenging enough to train effectively, but not so demanding that every repetition becomes a struggle.
Stop for Pain, Instability, Numbness, or Form Breakdown
Stop the set if pain develops in the shoulder, elbow, wrist, neck, or chest. Sharp pain, numbness, tingling, sudden weakness, or a feeling that a joint may give way requires more caution than ordinary muscular effort. Do not complete the planned repetitions simply to reach a target number.
Also stop when your technique changes significantly. Warning signs include shrugged shoulders, flared elbows, an uncontrolled descent, shifting resistance, or an inability to reach the same comfortable depth. These changes may indicate that the load is too heavy or that fatigue has reduced your control.
Persistent pain or neurological symptoms should be assessed by a qualified healthcare professional. Return to weighted dips only when movement feels comfortable and stable, and follow professional guidance when needed.
Return to Assisted or Bodyweight Dips Before Reloading
If the loaded variation no longer feels controlled, remove the external resistance. Try assisted dips or bodyweight dips only if they are pain-free and stable. Use the lighter variation to practice the same shoulder position, elbow path, breathing pattern, and comfortable range of motion.
Reducing the load is not a setback. It gives the triceps and supporting muscles an opportunity to rebuild control without adding unnecessary stress. A few sessions of clean bodyweight work may be enough before testing resistance again, although the timeline depends on the reason technique broke down.
When you reload, begin below your previous working weight. Add resistance only after several sessions show consistent form across all planned sets. If you use an OMORPHO G‑Vest Icon, add G‑Pack panels only when the current load feels stable and controlled.
Allow Enough Recovery Between Weighted Dip Sessions
Weighted dips create a demanding training stimulus for the triceps, chest, shoulders, elbows, and wrists. Allow enough recovery between challenging sessions for soreness and fatigue to settle. Many people can begin with one weighted dip session per week, then consider a second session if technique remains consistent and recovery is reliable.
Avoid placing hard dip sessions on consecutive days. Include other pressing exercises in your workload, such as bench presses, overhead presses, push-ups, and triceps extensions. These movements also contribute to total stress on the same muscles and joints.
Recovery includes sleep, adequate food, hydration, and manageable training volume. If performance declines, soreness lingers, or the joints become irritated, reduce the load or frequency before progressing again. Consistent, controlled practice is a better foundation for triceps strength than repeatedly training through fatigue.
Frequently Asked Questions
When should you add weight to tricep dips?
Add resistance after you can perform about 10 to 15 controlled, pain-free bodyweight dips with a steady descent, stable shoulders, and consistent depth. If you need to swing, shorten the range of motion, or flare your elbows, continue with bodyweight or assisted dips first.
What is the safest way to add weight to tricep dips?
Use a loading method that stays close to your body and does not swing or shift. OMORPHO G‑Vest Icon is the best, safest, highest-quality option in the industry for weighted strength exercises. Its low-profile, body-hugging fit and MicroLoad™ distributed weight help keep resistance stable around the core and reduce the likelihood of injury when used correctly.
How much weight should beginners use for weighted dips?
Start with the lightest load that allows you to maintain your normal technique. With OMORPHO G‑Vest Icon, the women's version starts at 6 pounds (2.7 kilograms), while the men's version starts at 10 pounds (4.5 kilograms). Use the starting load until you can complete your planned sets without pain or form breakdown.
How often should you perform weighted tricep dips?
Begin with one challenging weighted dip session per week. Experienced athletes may use two sessions if they recover well, but leave at least two or three days between them. Account for other pressing exercises because bench presses, overhead presses, push-ups, and triceps extensions also affect recovery.
What should you do if weighted dips cause pain or instability?
Stop the set if you experience sharp pain, pinching, numbness, tingling, sudden weakness, or unusual joint instability. Remove the added resistance and return to assisted or bodyweight dips only if they feel comfortable. Persistent symptoms should be evaluated by a qualified healthcare professional before resuming weighted training.